ESP32 Cheap Yellow Display (CYD): Complete Build Guide
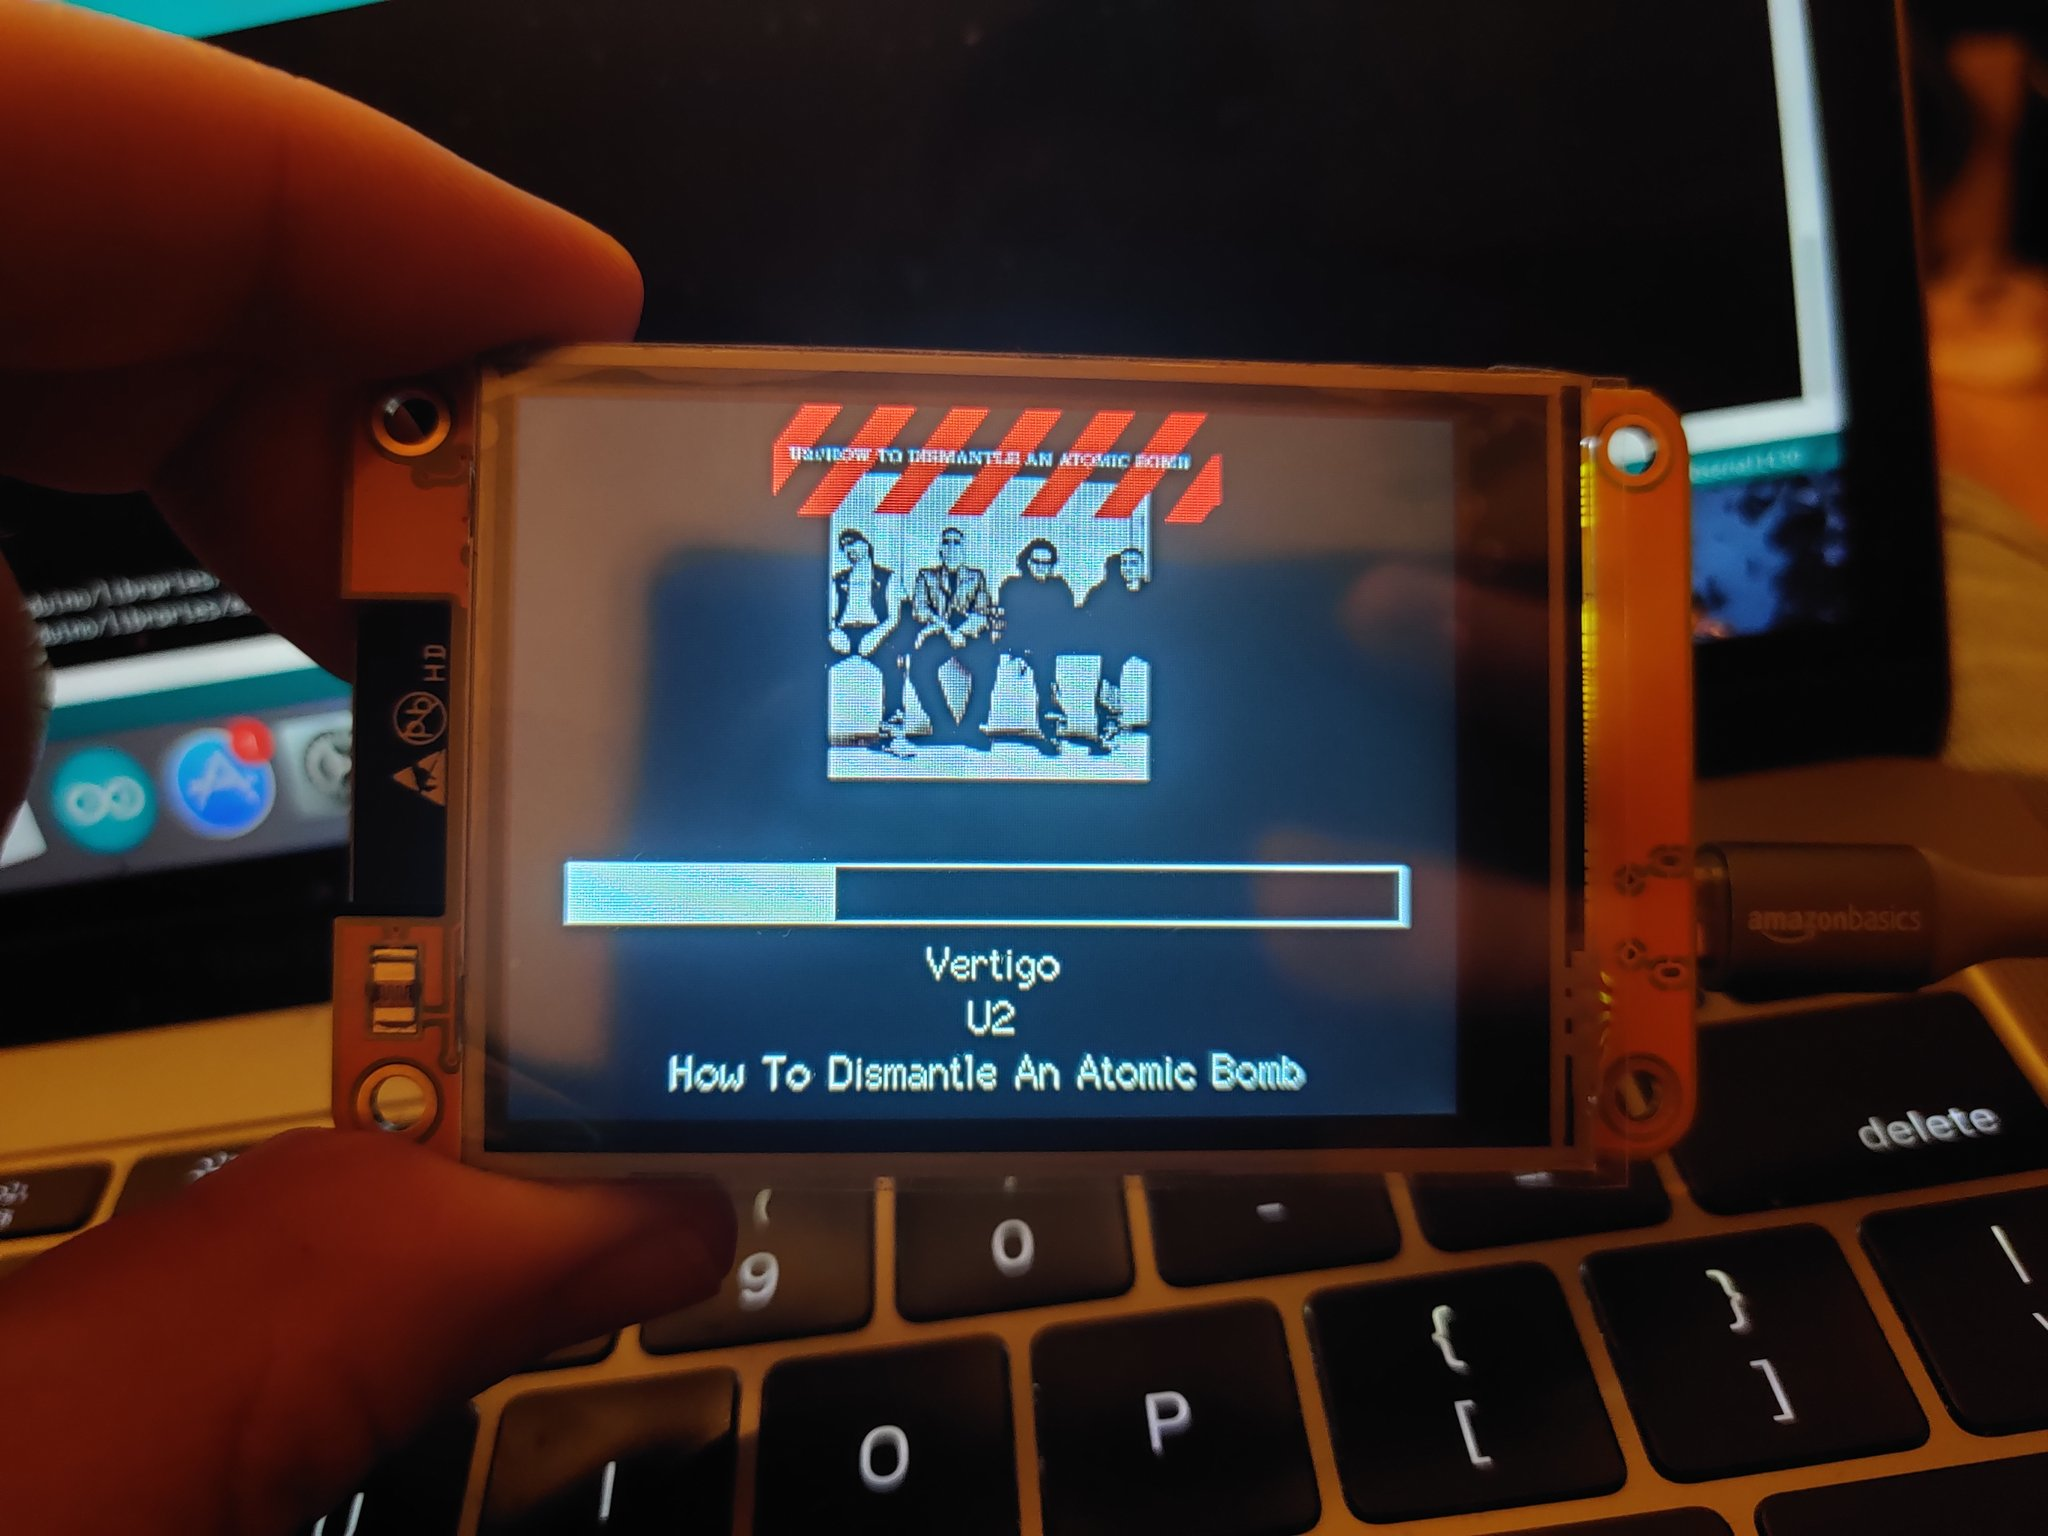
The ESP32-2432S028R Cheap Yellow Display board showing its 2.8-inch colour LCD, resistive touch screen, and USB connector.
- ESP32-2432S028R (Cheap Yellow Display / CYD)
- 2.8" 320×240 LCD display (built-in)
- Resistive touch screen (built-in)
- SD card slot (built-in)
- USB cable for power and programming
What You Will Build
The ESP32-2432S028R — better known in the maker community as the Cheap Yellow Display (CYD) — is a self-contained ESP32 development board with a 2.8-inch colour LCD touchscreen already wired and ready to go. Everything is built in: the display, the resistive touch panel, a USB port for power and programming, an SD card slot, an LED, and the ESP32's Wi-Fi and Bluetooth radio.
The CYD project is fundamentally a community hub: a shared collection of documentation, wiring references, example sketches, and ready-to-run projects that fill the gap left by the board's sparse original documentation. If you have ever wanted a cheap, compact display for a weather station, a home automation panel, a stock ticker, or a game, this board and community are designed exactly for that. No breadboard, no jumper wires, no soldering — just plug in a USB cable and start flashing code.
 \2
\2What You Need
Hardware
- ESP32-2432S028R board (the CYD). Available from Aliexpress or Makerfabs — search for the 2.8-inch version specifically, as other sizes exist. Price is roughly $15 delivered.
- A USB cable compatible with the board's USB port (check which connector your specific unit ships with).
- Optionally: a microSD card if you plan to use the SD slot.
Software
- Arduino IDE or PlatformIO with ESP32 board support installed.
- TFT_eSPI display library — the primary library used in the CYD Basics examples. You will need to configure it for the CYD's specific pins; the project's setup page covers this.
- Alternative display libraries are also supported; the repository includes examples for those as well.
- ESPHome is supported if you prefer a no-code/YAML approach.
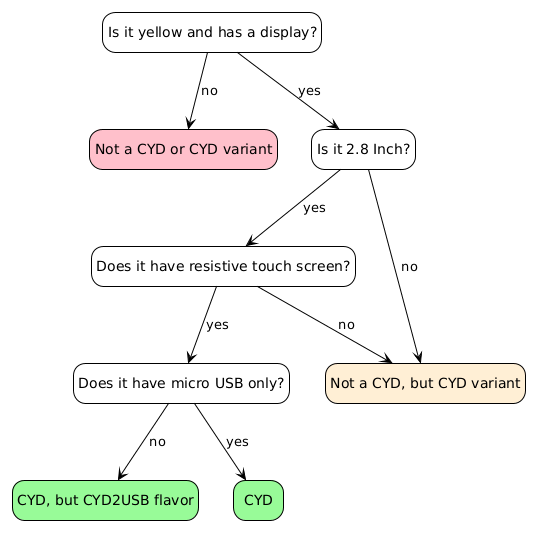
Is your board actually a CYD? The repository includes a decision-tree diagram to help you confirm. The key identifiers are the yellow PCB colour, the 2.8-inch screen size, and the ESP32-2432S028R part number printed on the board.
Typical use cases
Mount the CYD on a wall and use its touchscreen to display sensor readings, trigger automations, or integrate with Home Assistant via ESPHome — all without soldering a single wire.
Pull live data from any web API over Wi-Fi and display weather forecasts, stock prices, sports scores, or server status on the 2.8-inch colour screen.
Use the resistive touch screen and TFT_eSPI sprite support to build simple games, calculators, or other interactive UI projects in a compact, self-contained form factor.
Pair the CYD with community-contributed 3D-printed stands and cases to create a finished, desk-ready device without needing custom hardware design skills.
How It Works
The CYD packages an ESP32 microcontroller together with an SPI-connected LCD driver and a resistive touch controller on a single PCB. Because all the connections between the ESP32 and the display hardware are already made on the board, you do not need to wire anything — but you do need to tell your display library which pins are used for which function.
The CYD project's PINS.md page documents exactly which ESP32 GPIO pins are routed to the display, touch controller, SD card slot, LED, and the free breakout pins. This is the reference you will return to whenever you want to add external sensors or hardware through the exposed pins.
The TFT_eSPI library is the most commonly used option and requires a User_Setup.h configuration file that matches the CYD's wiring. The project's setup guide provides a pre-configured version of this file, which is the main thing that makes getting started straightforward compared to figuring it out from scratch.
Getting Set Up and Flashing Your First Sketch
The project's detailed setup and configuration steps are documented in the SETUP.md file in the repository. Follow that page as your primary reference — it covers installing board support, configuring TFT_eSPI, and verifying your toolchain.
The general workflow is:
- Install ESP32 board support in Arduino IDE (or set up a PlatformIO project).
- Install the TFT_eSPI library and replace its default
User_Setup.hwith the CYD-specific configuration provided in the repository. - Connect the CYD to your computer over USB.
- Select the correct board and COM port in your IDE.
- Open one of the Basics examples from the
/Examples/Basicsfolder in the repository. - Compile and upload.
The Basics examples are the recommended starting point — they demonstrate the display, touch input, Wi-Fi, and other built-in features one at a time. Once those work, the repository also contains alternative library examples and ESPHome configurations if you want to explore different approaches.
If something does not work as expected, the repository includes a TROUBLESHOOTING.md page that covers common problems.
Project Ideas and How to Extend It
Because the CYD has Wi-Fi, Bluetooth, a colour touchscreen, and an SD card slot in a single $15 package, the range of things you can build is wide:
- Home automation panel — display sensor readings, control smart home devices via HTTP or MQTT, or integrate with ESPHome for tight Home Assistant connectivity.
- Weather or data dashboard — fetch JSON from a public API over Wi-Fi and render graphs or readings on the screen.
- Retro games or UI experiments — the TFT_eSPI library supports sprites and fast rendering; the touch screen gives you interactive input.
- 3D-printed enclosures — the repository links to community-contributed 3D models for stands and cases in the
/3dModelsfolder. - Hardware add-ons — the ADDONS.md page lists additional peripherals that connect to the CYD's breakout pins.
Limitations to keep in mind:
- The touch screen is resistive, not capacitive. It responds to pressure, not light touch, and does not support multi-touch gestures.
- The display resolution is 320×240, which is usable but not sharp by modern standards.
- The free GPIO pins are limited; the display, touch, and SD card already consume most of the available pins.
- The original board documentation from the manufacturer is minimal; the CYD community project exists specifically to fill that gap, so the quality of documentation depends on community contributions.
- There is no built-in battery; the board is powered over USB.
Community and Further Resources
The CYD project's real value is the community around it. The GitHub repository is the central hub, and the project maintainer runs a Discord server where you can ask questions, share builds, and find collaborators.
The repository is also available in translated form for French, German, Traditional Chinese, Russian, Portuguese, and Spanish speakers — links to community-maintained translations are in the main README.
If you want to contribute examples or documentation, the project welcomes pull requests. If you want to support the maintainer's work, a GitHub Sponsors link is listed in the repository.
The Cheap Yellow Display punches well above its $15 price point by combining an ESP32, a colour touchscreen, Wi-Fi, Bluetooth, and an SD card slot on one board that needs nothing more than a USB cable to get started. The CYD community project transforms a hardware curiosity with poor original documentation into a well-supported platform with examples, pin references, troubleshooting guides, and ESPHome integration. If you want a quick-start display platform for IoT or interactive projects without any assembly, this is one of the most practical options available at this price.
Sources
github.comwitnessmenow/ESP32-Cheap-Yellow-Display — repository & READMEFacts in this article come from the project's public README and GitHub metadata at the time of writing. Images belong to their respective owners and link back to the original source.