Velxio: Simulate ESP32 and Arduino Projects in Your Browser
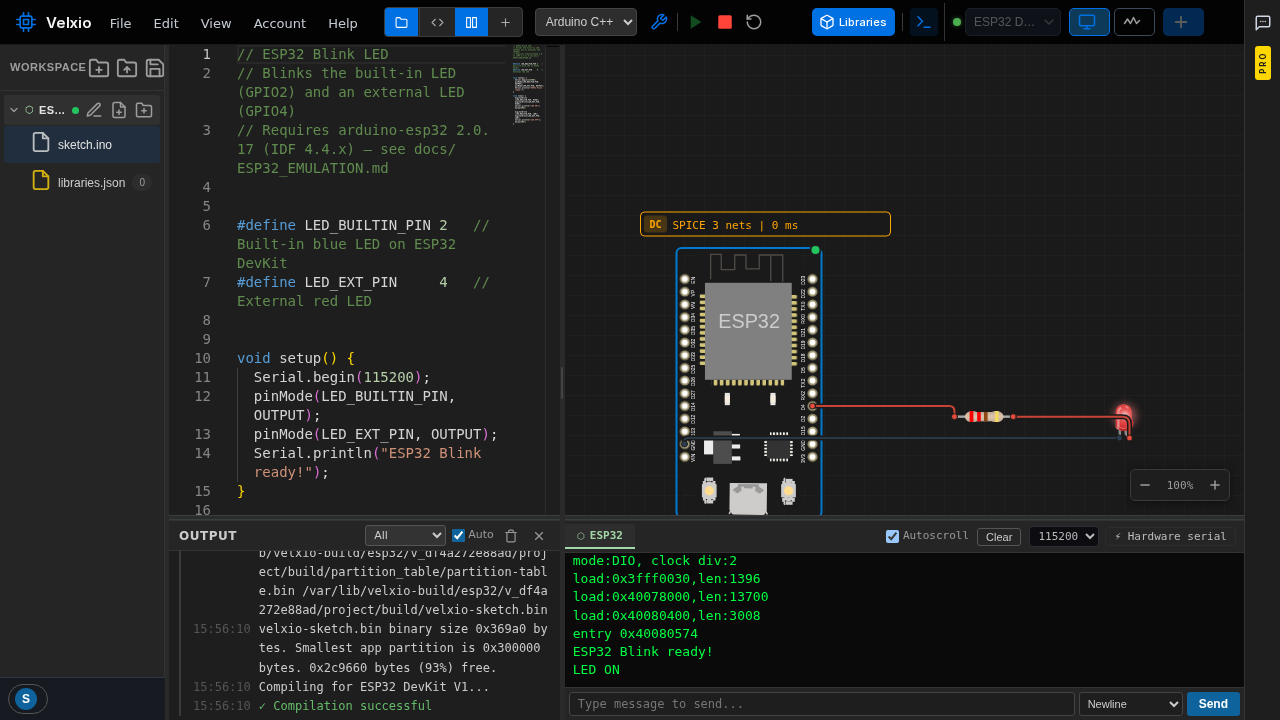
The Monaco editor with an ESP32 blink sketch on the left, the circuit canvas on the right, and the Serial Monitor open at the bottom.
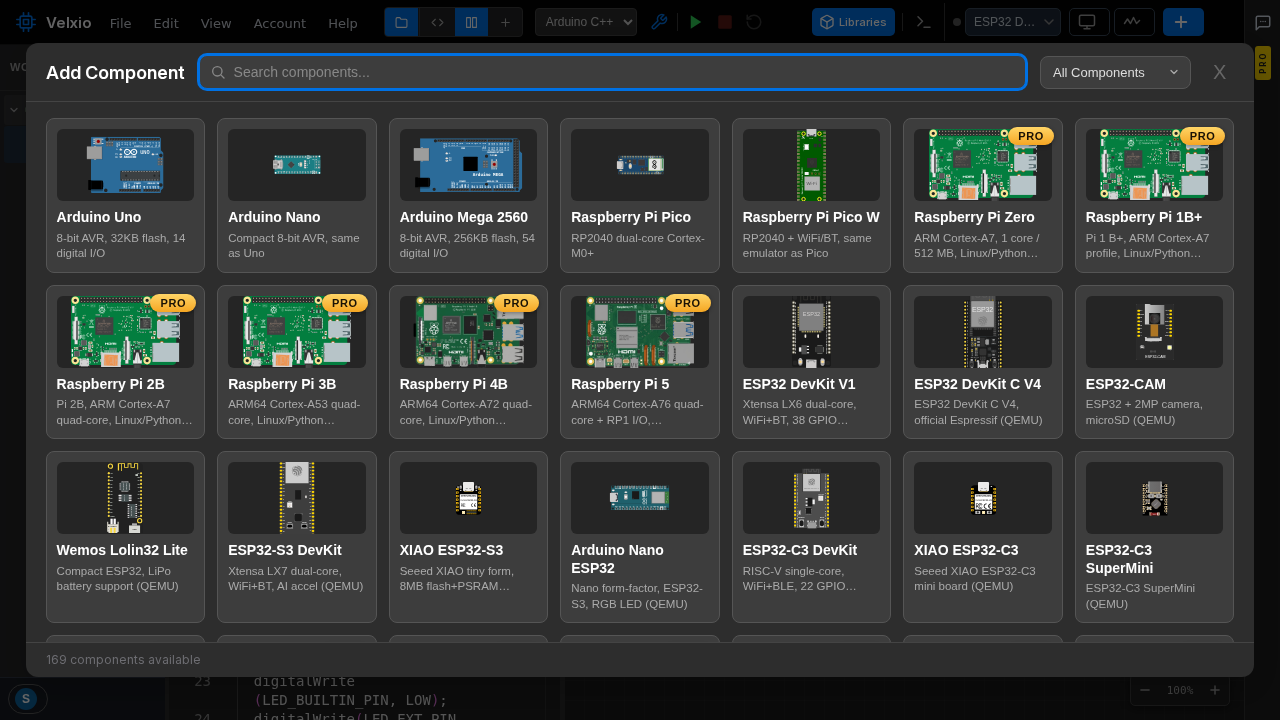
- Arduino Uno
- Arduino Nano
- Arduino Mega 2560
- ATtiny85
- Raspberry Pi Pico
- Raspberry Pi Pico W
- ESP32 DevKit V1
- ESP32-CAM
- ESP32-S3 DevKit
- ESP32-C3 DevKit
- ESP32-C6 DevKit
- XIAO ESP32-S3
- XIAO ESP32-C3
- Arduino Nano ESP32
- STM32 Blue Pill
- STM32 Black Pill
- STM32F4 Discovery
- M5Stack Cardputer ADV
- M5Stack Core
- Pimoroni Badger 2350
- DFRobot UNIHIKER M10
- Raspberry Pi 3
- Raspberry Pi 5
What You Will Build
Velxio is an open-source multi-board emulator and circuit simulator that runs entirely in your browser. Instead of buying hardware, installing SDKs, and wiring components on a physical bench, you open a webpage, pick a board, drop components onto a canvas, write your sketch, and press Play.
The result is a fully interactive simulation: LEDs blink, serial output scrolls in the monitor, potentiometers inject analog voltages, and an oscilloscope traces signals on any pin — all without touching a soldering iron or waiting for shipping. Because the emulation runs real compiled firmware against cycle-accurate CPU models, the code you test here is the same code you would flash to real silicon.
This makes Velxio especially practical for three situations: learning embedded programming before buying hardware, rapidly prototyping firmware logic you will later deploy to physical boards, and sharing reproducible circuit + code examples with a team or a class.
 \2
\2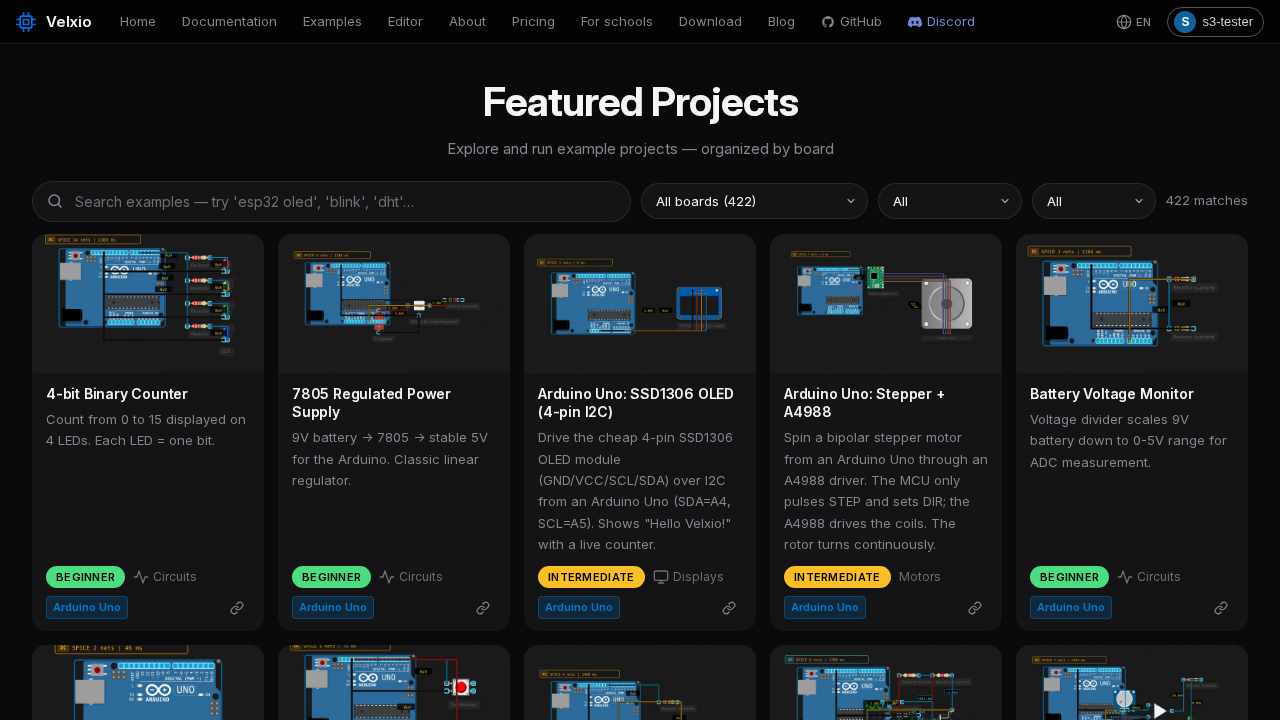 \2
\2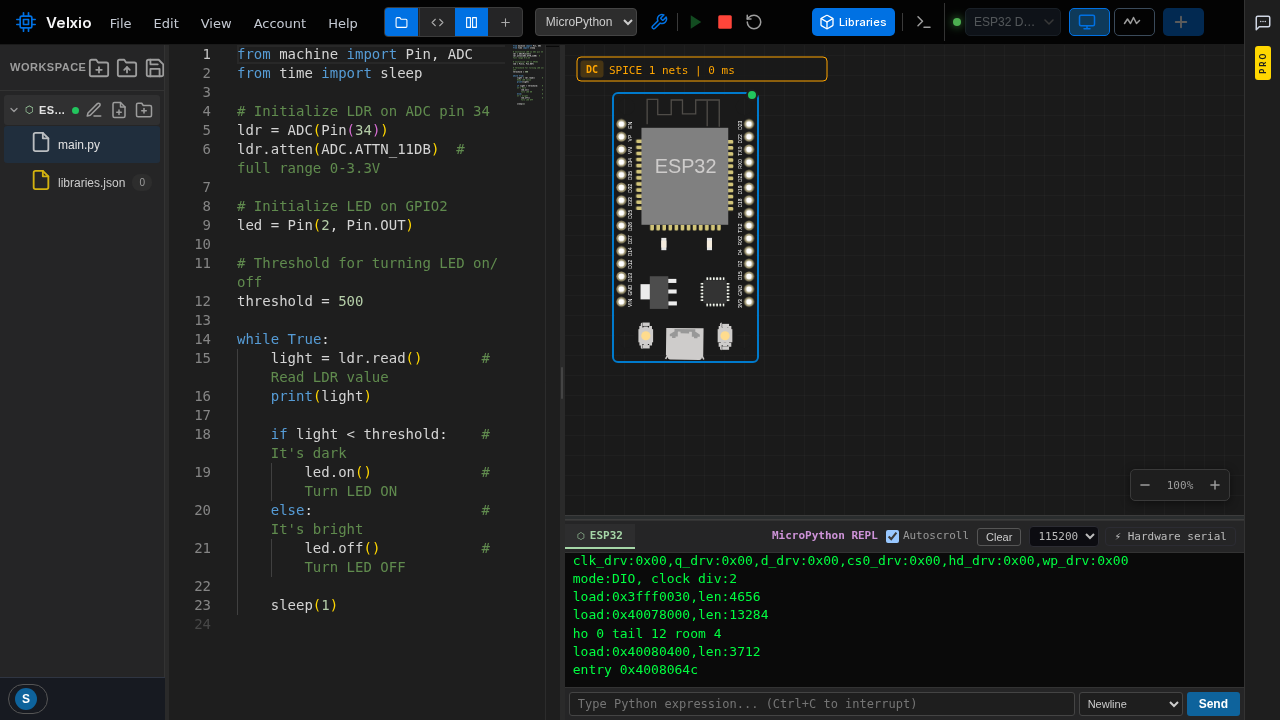 \2
\2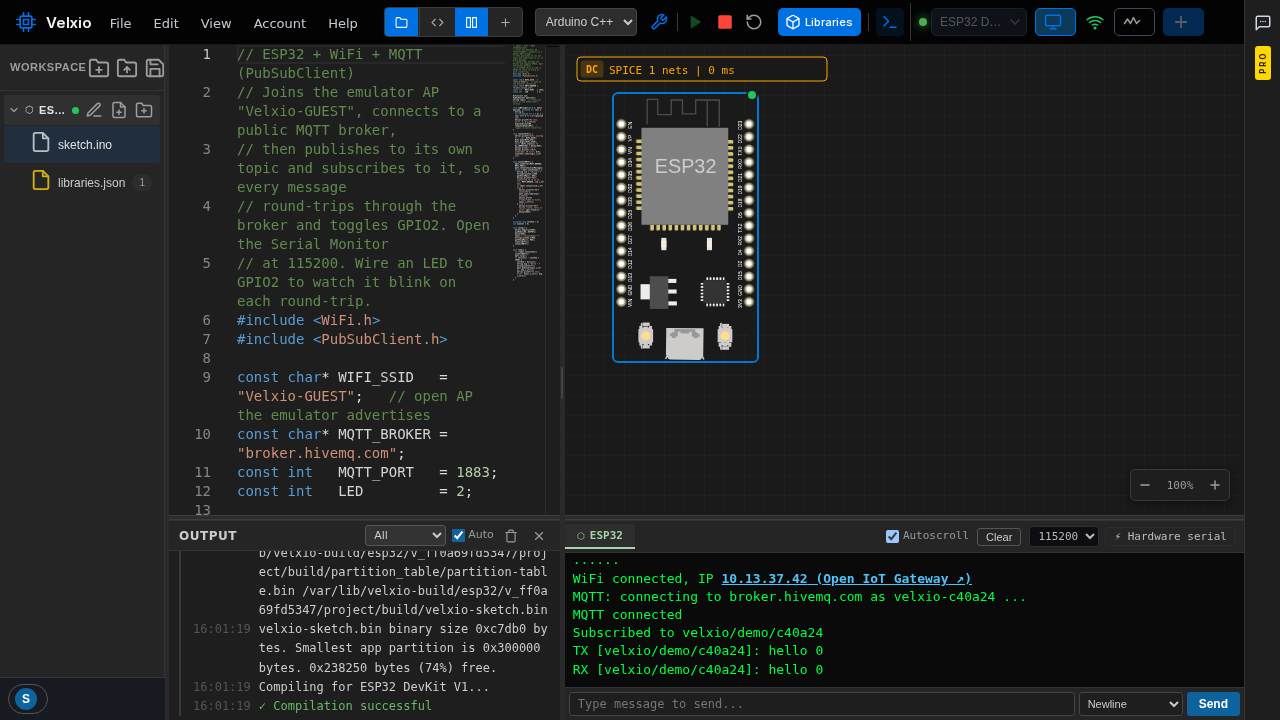 \2
\2What You Need
To use the hosted version: nothing beyond a modern web browser. Navigate to velxio.dev, create a free account, and you have access to the full editor immediately. No installation, no drivers, no toolchain setup.
To self-host: a machine with Docker installed. The official image is published to GitHub Container Registry and bundles the compiler toolchain, the QEMU backend, and the web frontend in a single container.
The self-hosted image covers the first five board families out of the box:
- Arduino / AVR (Uno, Nano, Mega 2560, ATtiny85)
- Raspberry Pi Pico and Pico W
- ESP32 (DevKit V1, DevKit-C V4, ESP32-CAM, Wemos Lolin32 Lite)
- ESP32-S3 (DevKit, XIAO ESP32-S3, Arduino Nano ESP32)
- ESP32-C3 (DevKit, XIAO ESP32-C3, ESP32-C3 SuperMini)
STM32, Raspberry Pi Linux boards, and branded partner boards (M5Stack, Pimoroni, DFRobot, Seeed) are only available at velxio.dev.
Typical use cases
Wire up sensors, displays, and logic ICs on the virtual canvas and test firmware logic before ordering a single component.
Work through the 400+ built-in examples or write your own sketches in Arduino C++, MicroPython, or ESP-IDF with instant feedback from the Serial Monitor.
Use the built-in oscilloscope and SPICE electrical layer to trace GPIO signals, measure voltages, and catch wiring faults the same way you would on a physical bench.
Share a project link so teammates or students open an identical board-and-code setup in their own browser — no environment setup required on their end.
How It Works
Velxio splits boards into two execution paths depending on the CPU family.
Browser boards — AVR (Arduino Uno, Nano, Mega, ATtiny85) and RP2040 (Raspberry Pi Pico, Pico W) — are emulated entirely inside the browser tab using avr8js and rp2040js respectively. Your sketch is compiled on the backend to a .hex or .bin file, then downloaded and executed locally at native clock speed. Nothing beyond the compiled binary leaves the backend; the simulation loop runs at roughly 60 FPS via requestAnimationFrame.
Server boards — the ESP32 family and STM32 — boot a real QEMU machine on the backend. QEMU streams GPIO state and serial data back to the canvas in real time, which is why ESP32 simulations can do things that are genuinely hard to emulate in a browser alone: emulated WiFi that actually joins a virtual access point and round-trips messages through a public MQTT broker, I2C and SPI buses talking to display drivers, and full ESP-IDF projects alongside Arduino sketches and MicroPython.
The Monaco editor (the same editor used in VS Code) handles code with syntax highlighting and autocomplete. arduino-cli on the backend handles compilation and produces the binary that feeds into either path. A SPICE-based electrical layer runs in parallel and shows currents, voltages, and shorts on the wires you draw.
Get Started in the Browser
The fastest path to a running simulation is the hosted editor:
- Open velxio.dev in a browser.
- Click New Project and choose a board — for a first experiment, pick ESP32 DevKit V1.
- Open the Component Picker (the icon in the toolbar) and drag an LED and a resistor onto the canvas. Connect them to a GPIO pin and GND.
- Write or paste a blink sketch in the Monaco editor on the left.
- Click Compile, wait for the compilation console to show success, then click Run.
The LED on the canvas starts toggling. Open the Serial Monitor at the bottom to see any Serial.println() output.
To try MicroPython instead, switch the language selector to MicroPython, rename your file to main.py, and click Run. The REPL appears in the terminal panel and accepts live input.
The Examples Gallery contains more than 400 ready-to-run projects filtered by board, difficulty, and topic — a good starting point if you want to see a specific peripheral or protocol in action before writing code from scratch.
Self-Host with Docker
If you want to run Velxio on your own infrastructure — a local machine, a home server, or a private cloud instance — one Docker command brings up the full stack:
docker run -d \
  --name velxio \
  -p 3080:80 \
  -v velxio-data:/app/data \
  -v velxio-arduino-libs:/root/.arduino15 \
  -v velxio-arduino-user-libs:/root/Arduino \
  -v velxio-ccache:/var/cache/ccache \
  -v velxio-build:/var/lib/velxio-build \
  ghcr.io/davidmonterocrespo24/velxio:master
Then open http://localhost:3080.
The five named volumes are important — do not skip them. Without them, every container restart wipes the ESP-IDF build cache, and the first compile after each restart takes 5–7 minutes instead of 5–30 seconds. With the volumes in place, subsequent compiles are fast because the toolchain cache persists across restarts.
To watch the container logs at any time:
docker logs -f velxio
The self-hosted instance does not require a license for personal or open-source use (AGPL v3). A commercial license is available separately for commercial deployments.
Ideas to Extend It — and Limitations to Know
Custom chips: Velxio includes a custom chip editor that lets you write your own IC in C, compile it to WebAssembly, and drop it on the canvas alongside standard boards. This is useful for modeling proprietary sensors or peripherals that are not yet in the catalog.
Instruments: The built-in oscilloscope can trace any GPIO pin. The SPICE-based electrical layer shows current flow, voltage levels, and short-circuit detection on the wires you draw between components, which helps debug wiring mistakes the same way a multimeter would on a real bench.
Multi-file projects: The editor supports multiple .ino, .h, .cpp, and .py files in a single workspace, so you can structure larger projects the same way you would for a physical deployment.
Limitations to keep in mind:
- The self-hosted image covers only Arduino/AVR, RP2040, and the ESP32 family. STM32, Raspberry Pi Linux boards, and all branded partner boards (M5Stack, Pimoroni, DFRobot, Seeed) are only available on velxio.dev — some on the free plan, some requiring a paid plan.
- STM32 and Raspberry Pi Linux emulation relies on licensed binaries and multi-gigabyte boot images that are not bundled in the open-source container.
- Server-side boards (ESP32, STM32) depend on a backend QEMU process. High-concurrency self-hosted deployments will need resources proportional to the number of simultaneous simulations.
- Emulation is accurate enough for firmware logic and peripheral testing, but it is not a substitute for timing-critical hardware validation or RF behaviour testing.
Velxio removes the hardware barrier from embedded development entirely: a browser tab replaces a dev board, a USB cable, and a toolchain installation, while still compiling and running your actual firmware rather than interpreting it. The self-hosted Docker image makes it straightforward to run on private infrastructure for teams or classrooms, and the 400-example gallery gives newcomers a practical on-ramp to ESP32, Arduino, and Pico development. The main constraint to plan around is that STM32, Raspberry Pi Linux, and partner boards are hosted-only features — the self-hosted image is firmly focused on the AVR and ESP32 families.
Sources
github.comdavidmonterocrespo24/velxio — repository & README velxio.devOfficial websiteFacts in this article come from the project's public README and GitHub metadata at the time of writing. Images belong to their respective owners and link back to the original source.