ESP32-CAM Webserver: Build a Wi-Fi Streaming Camera
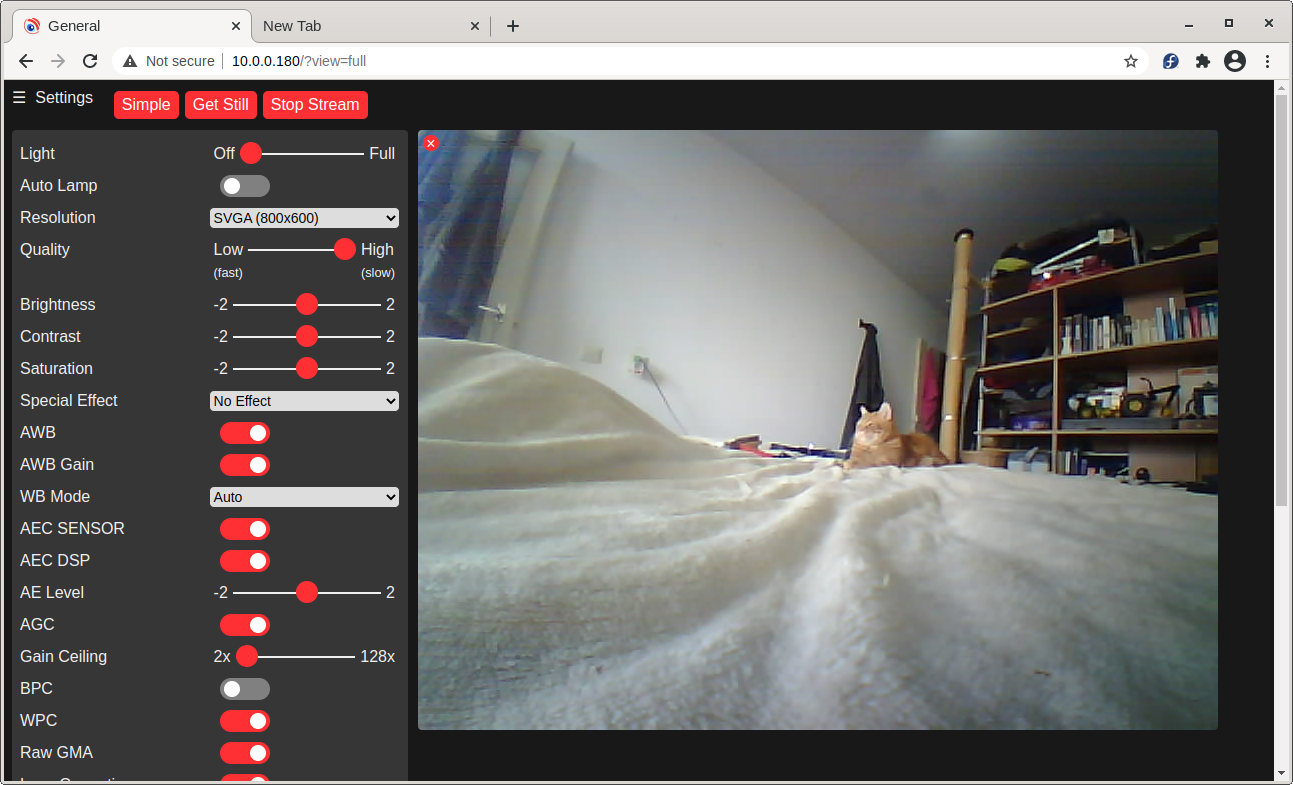
Live MJPEG stream from an ESP32-CAM catching two cats — the default simple viewer in action.
- AI-Thinker ESP32-CAM
- OV2640 camera module
- OV3660 camera module
- WRover Kit
- ESP Eye
- M5Stack ESP32 camera module
- FTDI Friend 3.3 V serial adapter
What You Will Build — and an Honest Warning
This project gives you a self-contained Wi-Fi webcam server running on an ESP32-CAM module. Point a browser at the board's IP address and you get a live MJPEG video stream, camera controls (resolution, quality, white balance, and more), on-board lamp brightness, image rotation, a standalone full-screen stream viewer, and over-the-air (OTA) firmware updates — all without any cloud service or external server.
Before you commit time and parts, read the notice at the top of the repository: this sketch is described by its author as old and rather obsolete. It targets ESP32 Arduino core 2.0.2 specifically, and will not build correctly against newer core versions. If you need a project built on a current toolchain, the repository suggests looking for alternatives. That said, the sketch remains popular, is actively discussed in its forum, and works reliably within its stated constraints. It is a solid choice for learning, for retrofitting a robot or 3D printer with a camera, or for any build where you already have an AI-Thinker ESP32-CAM on hand and want results quickly.
 \2
\2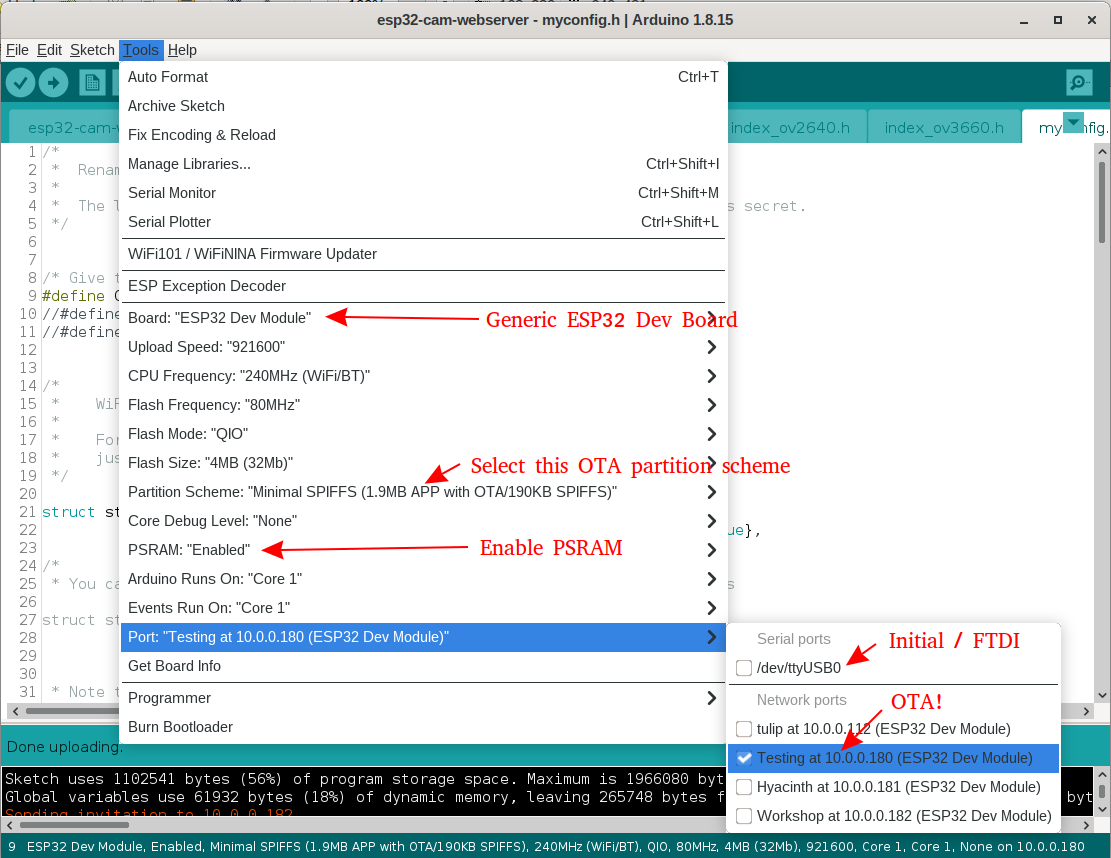 \2
\2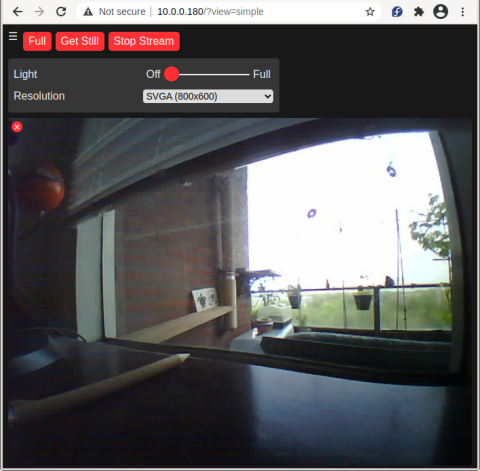 \2
\2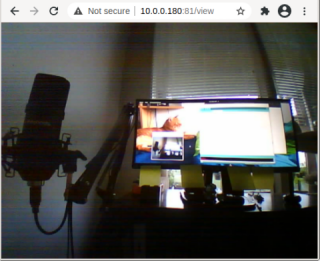 \2
\2What You Need
Hardware
- AI-Thinker ESP32-CAM board with OV2640 camera (the author's tested combination; pinouts for WRover Kit, ESP Eye, and M5Stack are included but untested by the author)
- A 3.3 V FTDI serial adapter (the author uses an Adafruit FTDI Friend) — do not use a 5 V adapter, it will damage the ESP32
- Five jumper wires
- A 5 V power supply capable of clean current delivery (short cables and a quality supply matter for both Wi-Fi stability and image quality)
- Optional: a small switch wired to GPIO0 to make repeated flashing easier
Software
- Arduino IDE (latest version at time of use)
- Espressif Arduino core 2.0.2 — install exactly this version; newer versions break the build
- The sketch itself: download the latest release ZIP from the repository's releases page, unpack it into your Arduino sketch folder, and rename the extracted folder to remove the version number (e.g.
esp32-cam-webserver-4.0becomesesp32-cam-webserver), then openesp32-cam-webserver.ino
Typical use cases
Mount the ESP32-CAM on a rover or arm and use the HTTP API to pull frames or stream live video to a control interface, giving your robot a wireless eye with no extra compute board needed.
Attach the module inside or above a printer enclosure and stream the build plate to a browser tab or OctoPrint. OTA updates mean you never have to physically reach the board again.
Point the module at a door, gate, or workshop bench and access the MJPEG stream from any device on your local network without any cloud account or subscription.
Drive the camera programmatically from a Raspberry Pi, Home Assistant, or any HTTP-capable controller using the documented API endpoints for snapshots, resolution changes, and lamp control.
How It Works
The sketch starts a lightweight HTTP server on the ESP32. When a browser connects, it serves a single-page HTML/JavaScript UI (stored as raw text in the sketch, not compressed binary, which makes it easy to edit). The UI communicates with the camera over a documented HTTP API — the same endpoints you can call from scripts or automation tools.
The video feed is a MJPEG stream: the browser holds an HTTP connection open and JavaScript requests each new frame in turn. This means only one stream can be active at a time. If a second client tries to connect while streaming is in progress, it will time out.
On first boot the board creates a Wi-Fi access point named ESP32-CAM-CONNECT with the password InsecurePassword. Connect to it and browse to http://192.168.4.1/. For permanent use, copy myconfig.sample.h to myconfig.h in the sketch folder and fill in your home Wi-Fi credentials, a camera name, and any board-specific defaults. Because myconfig.h is your private file, it will not be overwritten when you update the sketch.
Wiring and Flashing
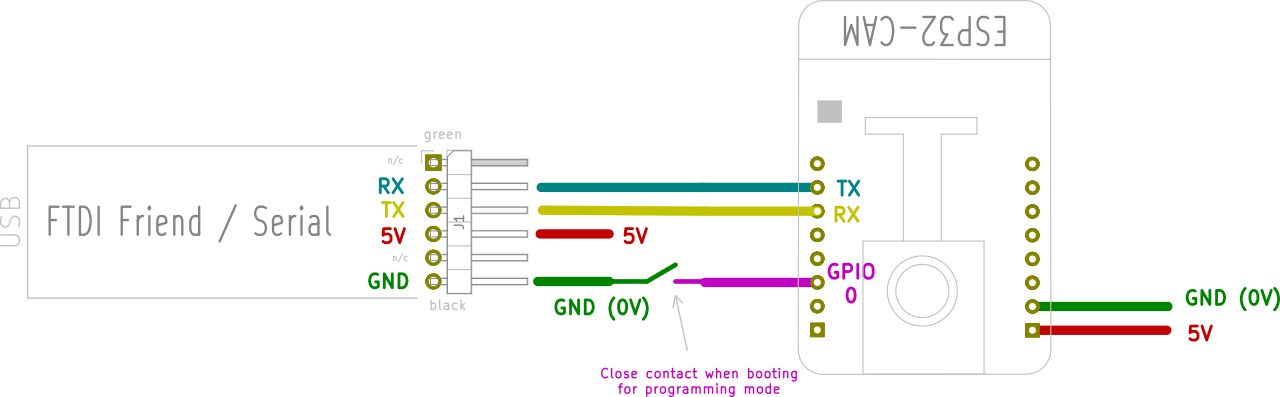
Wire the FTDI adapter to the AI-Thinker board
| FTDI Friend | AI-Thinker ESP32-CAM |
|---|---|
| RX | TX |
| TX | RX |
| 5 V | 5 V |
| GND | GND |
| — | GPIO0 → GND (for programming mode) |
GPIO0 must be held LOW when the board powers up to enter programming mode. A jumper wire from GPIO0 to GND, connected before you apply power, is the minimum requirement. A momentary switch makes repeated flashing much less fiddly.
Arduino IDE board settings
In the IDE boards menu, select ESP32 Dev Module from the ESP32 Arduino section. Do not choose the dedicated AI-Thinker entry — it is not OTA-compatible and will cause the module to crash and reboot instead of updating.
Set these two options before compiling:
- Partition Scheme:
Minimal SPIFFS (1.9MB APP with OTA / 190KB SPIFFS) - PSRAM:
Enabled
Upload sequence
- Ground GPIO0 and power the board.
- Click Upload in the IDE. When
Connecting...appears in the console, reboot the ESP32 (most boards have a reset button) while keeping GPIO0 grounded. - Once the progress bar completes, release GPIO0 and reboot the board normally.
- Open the Serial Monitor. The board will print its assigned IP address once it connects to Wi-Fi.
- Navigate to that IP in a browser. The settings panel will open automatically.
Subsequent uploads via OTA
After the first successful upload, the board appears in the IDE's network ports list. You can compile and upload wirelessly from that point on — no serial adapter needed.
If you configured a status LED, it gives a double flash when Wi-Fi connection begins and five short flashes on success.
Exploring the Web UI
The default view is a simplified layout showing the stream window and the most-used controls. A standalone stream viewer (no controls, resizable, double-click for fullscreen) is available at /stream. A /dump page shows detailed status information — useful for debugging and for checking whether the camera reports itself as currently streaming.
The HTTP API is documented in API.md in the repository. You can send commands directly from scripts, Home Assistant automations, a Raspberry Pi on the same network, or any robot controller that has HTTP client support. This makes the sketch useful as a camera node in a larger system rather than just a standalone viewer.
Extending the Build and Known Limitations
Ideas from the repository road map and community
- Mount the board on a pan-tilt servo bracket and drive it from a microcontroller that also calls the camera's HTTP API to grab frames or trigger snapshots.
- Add a BME280 or DHT11 sensor and wire it to spare GPIO pins; the road map mentions plans for sensor OSD overlays.
- Use the standalone stream viewer URL as the video source in OBS or VLC for recording or restreaming.
- The author mentions printing or sourcing a case from Thingiverse (a specific listing is linked in the README) to protect the module.
- The SD card capture feature is on the road map but not yet implemented in v4.0.
Limitations to keep in mind
- One stream at a time. A second browser tab or client will get no response until the first disconnects.
- Wi-Fi sensitivity. The AI-Thinker module is susceptible to power-supply noise and congested Wi-Fi. Use short, quality cables and a clean 5 V supply. Decoupling capacitors on the power lines can help in electrically noisy environments.
- PlatformIO builds are broken in v4.0 — the stream dies shortly after starting. Use the Arduino IDE.
- Core version lock. The sketch only builds correctly against ESP32 Arduino core 2.0.2. This is the most significant long-term constraint; the author considers the project in archival status and recommends looking for actively maintained alternatives for new designs.
esp32-cam-webserver is a well-documented, beginner-accessible starting point for adding a Wi-Fi camera to a robot or monitoring rig using the cheap AI-Thinker ESP32-CAM module. The OTA support, clean web UI, and documented HTTP API make it genuinely practical rather than just a demo. The core version lock and single-stream limit are real constraints — go in with eyes open, and if you need a project built on current tooling, follow the author's advice and look for a maintained successor.
Sources
github.comeasytarget/esp32-cam-webserver — repository & README hackaday.ioOfficial websiteFacts in this article come from the project's public README and GitHub metadata at the time of writing. Images belong to their respective owners and link back to the original source.