ESP32 E-Paper Weather Display: Build Guide (esp32-weather-epd)
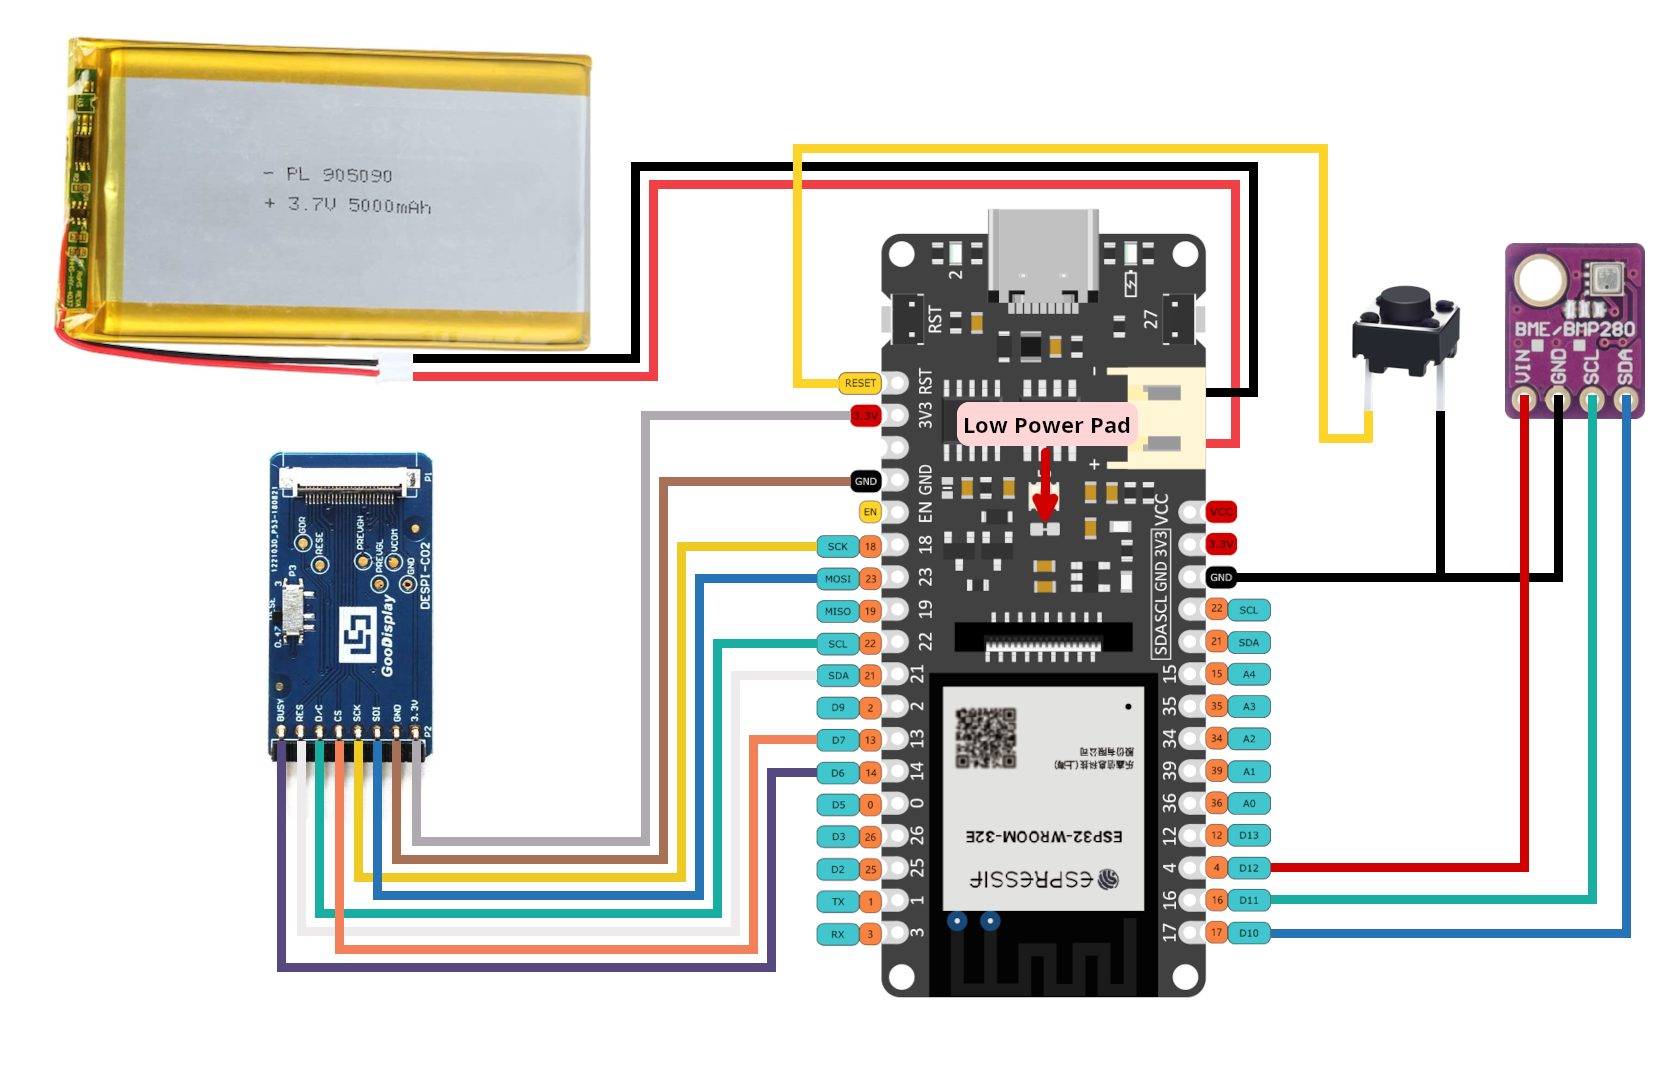
Wiring diagram showing connections between the FireBeetle 2 ESP32-E, DESPI-C02 adapter, BME280 sensor, and E-Paper panel.
- FireBeetle 2 ESP32-E
- Waveshare 7.5in e-paper display (v2)
- Good Display 7.5in e-paper (GDEY075T7)
- Waveshare 7.5in e-Paper (B)
- Good Display 7.5in e-paper (GDEY075Z08)
- Waveshare 7.3in ACeP e-Paper (F)
- Good Display 7.3in e-paper (GDEY073D46)
- Good Display 7.3in e-paper (GDEP073E01)
- DESPI-C02 adapter board
- BME280 temperature/humidity/pressure sensor
- 3.7V LiPo battery with JST-PH2.0 connector
What You Will Build
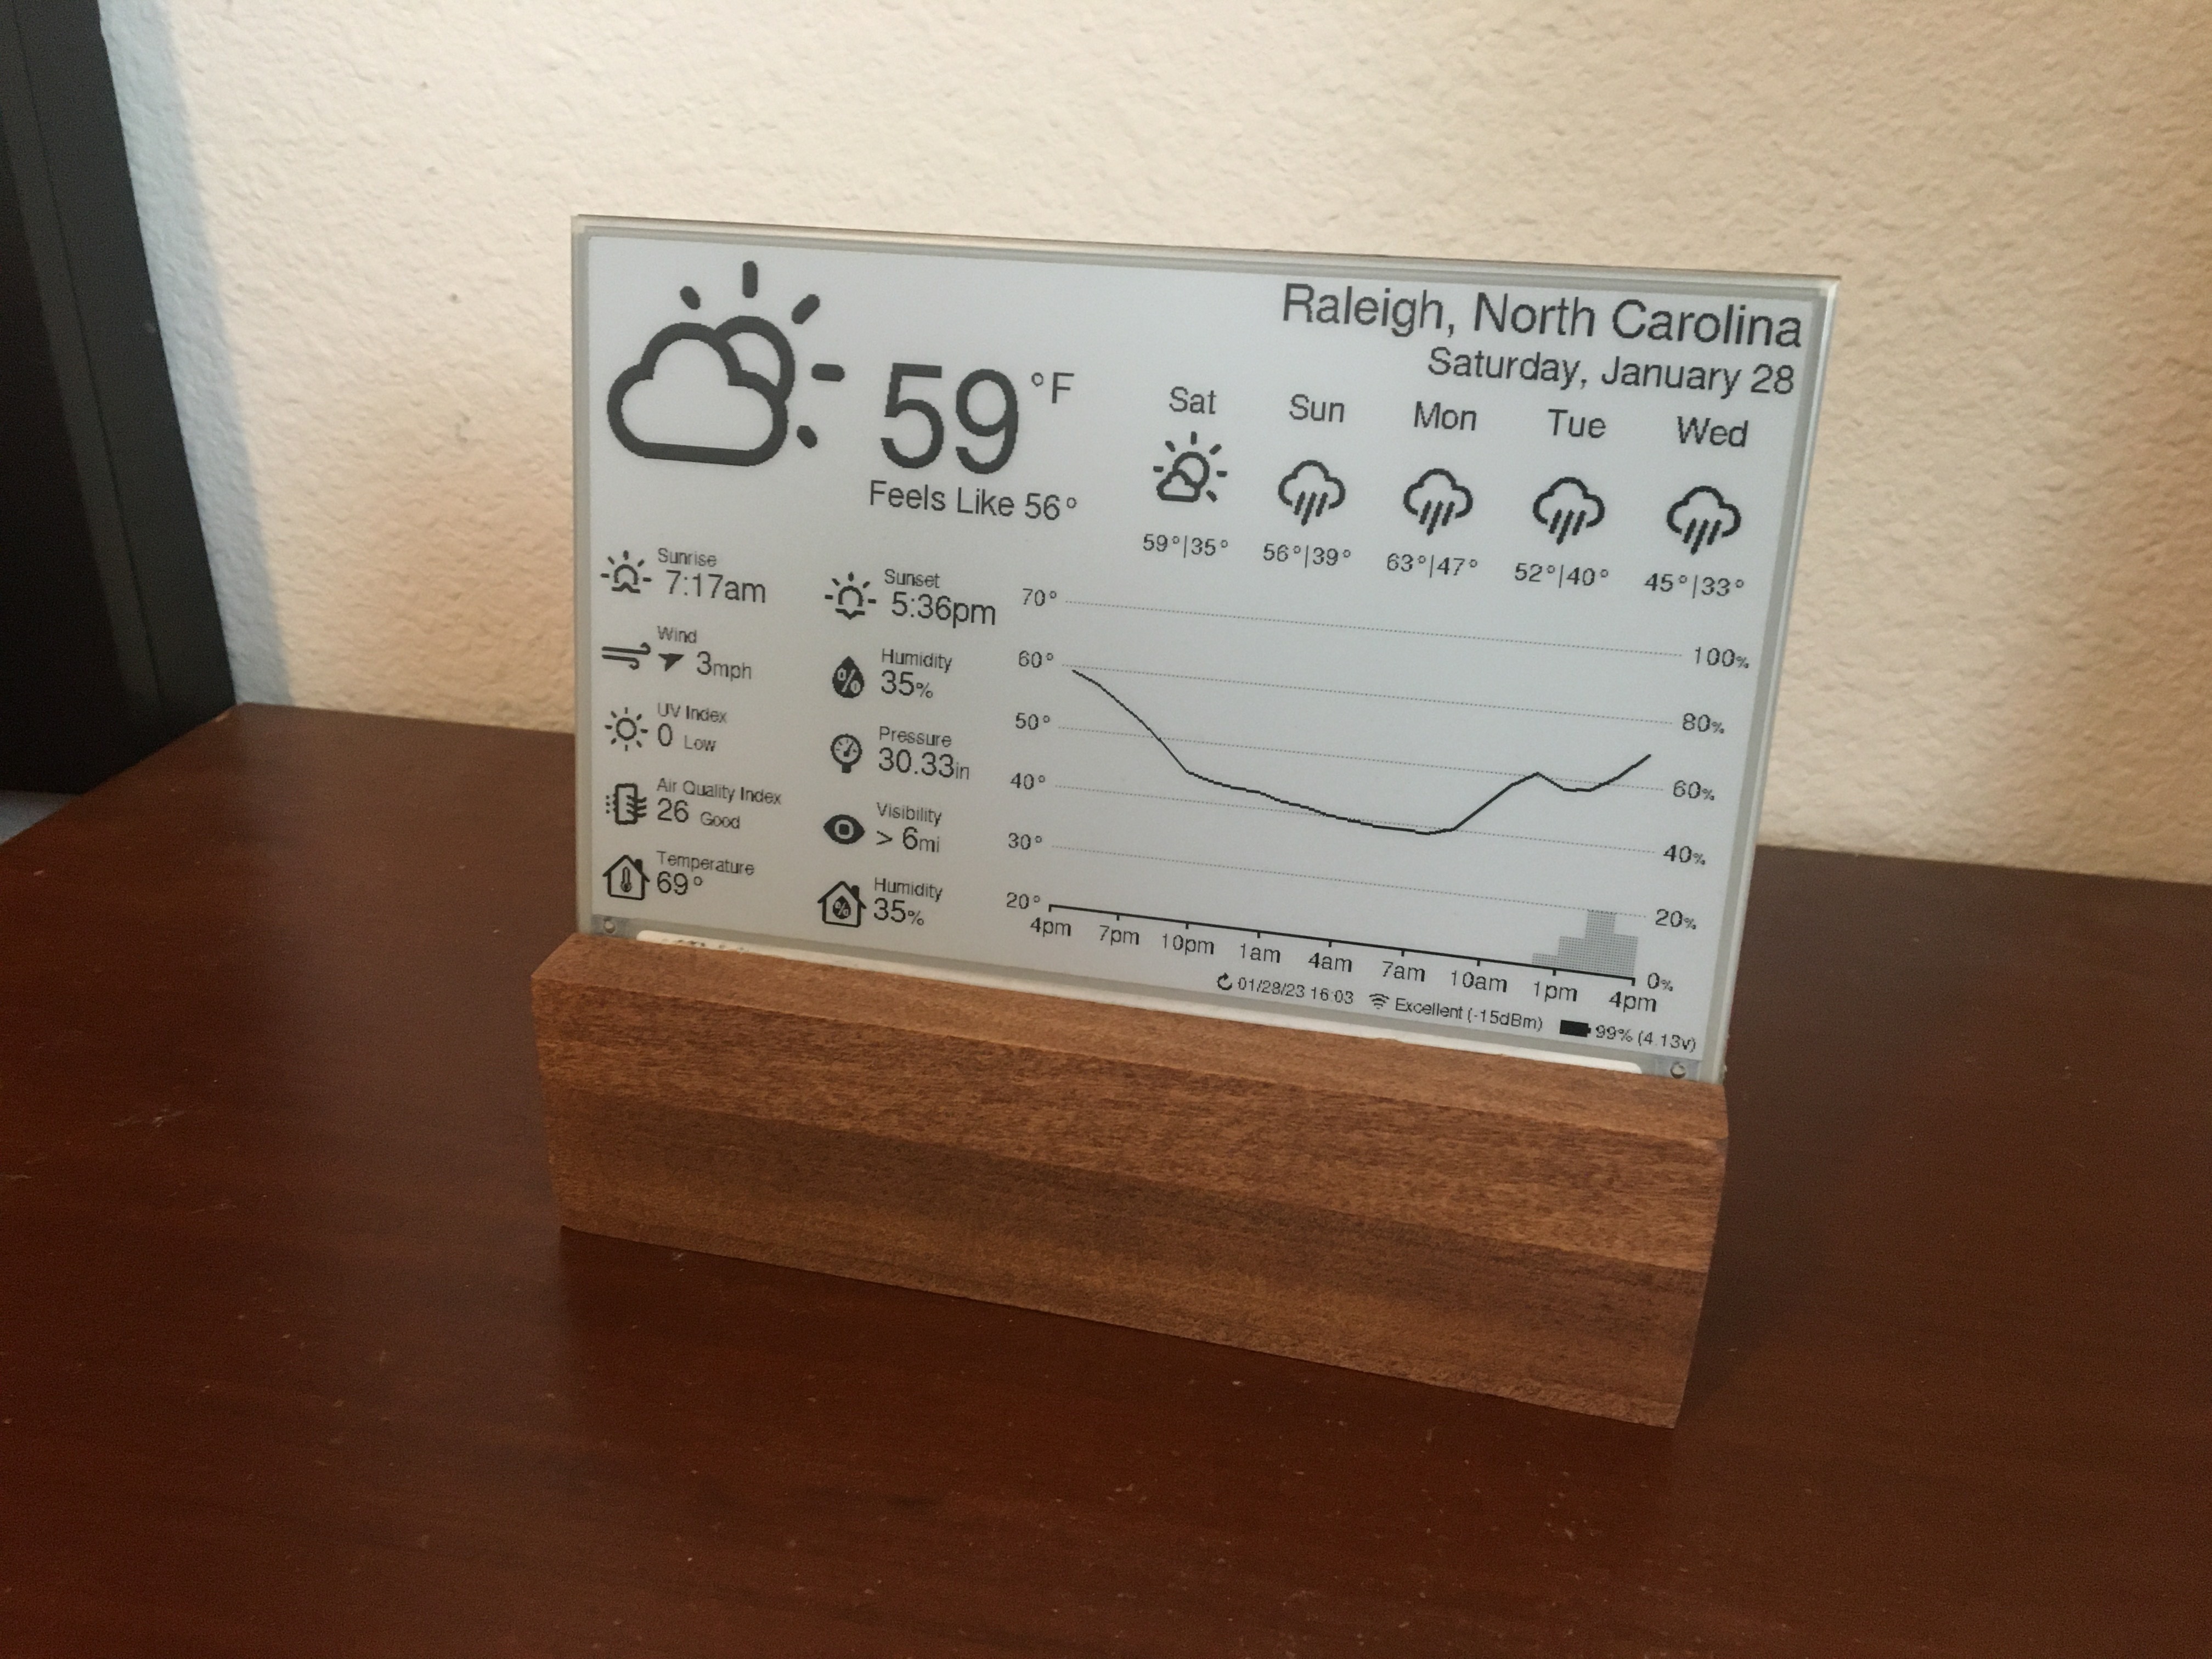
This project produces a self-contained weather station that refreshes on a schedule you choose — every 30 minutes by default — and displays the current forecast pulled from the OpenWeatherMap API on a large 7.5-inch E-Paper screen. An onboard BME280 sensor adds real indoor temperature and humidity to the same screen.
Because E-Paper holds its image without any power and because the ESP32 spends almost all of its time in deep sleep (~14 μA), the whole unit can run for six to twelve months on a single 5000 mAh LiPo before you need to plug in a USB-C cable. The display is highly configurable: metric or imperial units, multiple languages, 12/24-hour time, AQI scale selection, and an hourly outlook graph showing temperature trend and precipitation probability. You can choose a black-and-white panel, a red/black/white panel, or a seven-color panel depending on your taste and acceptable refresh-time trade-off.
 \2
\2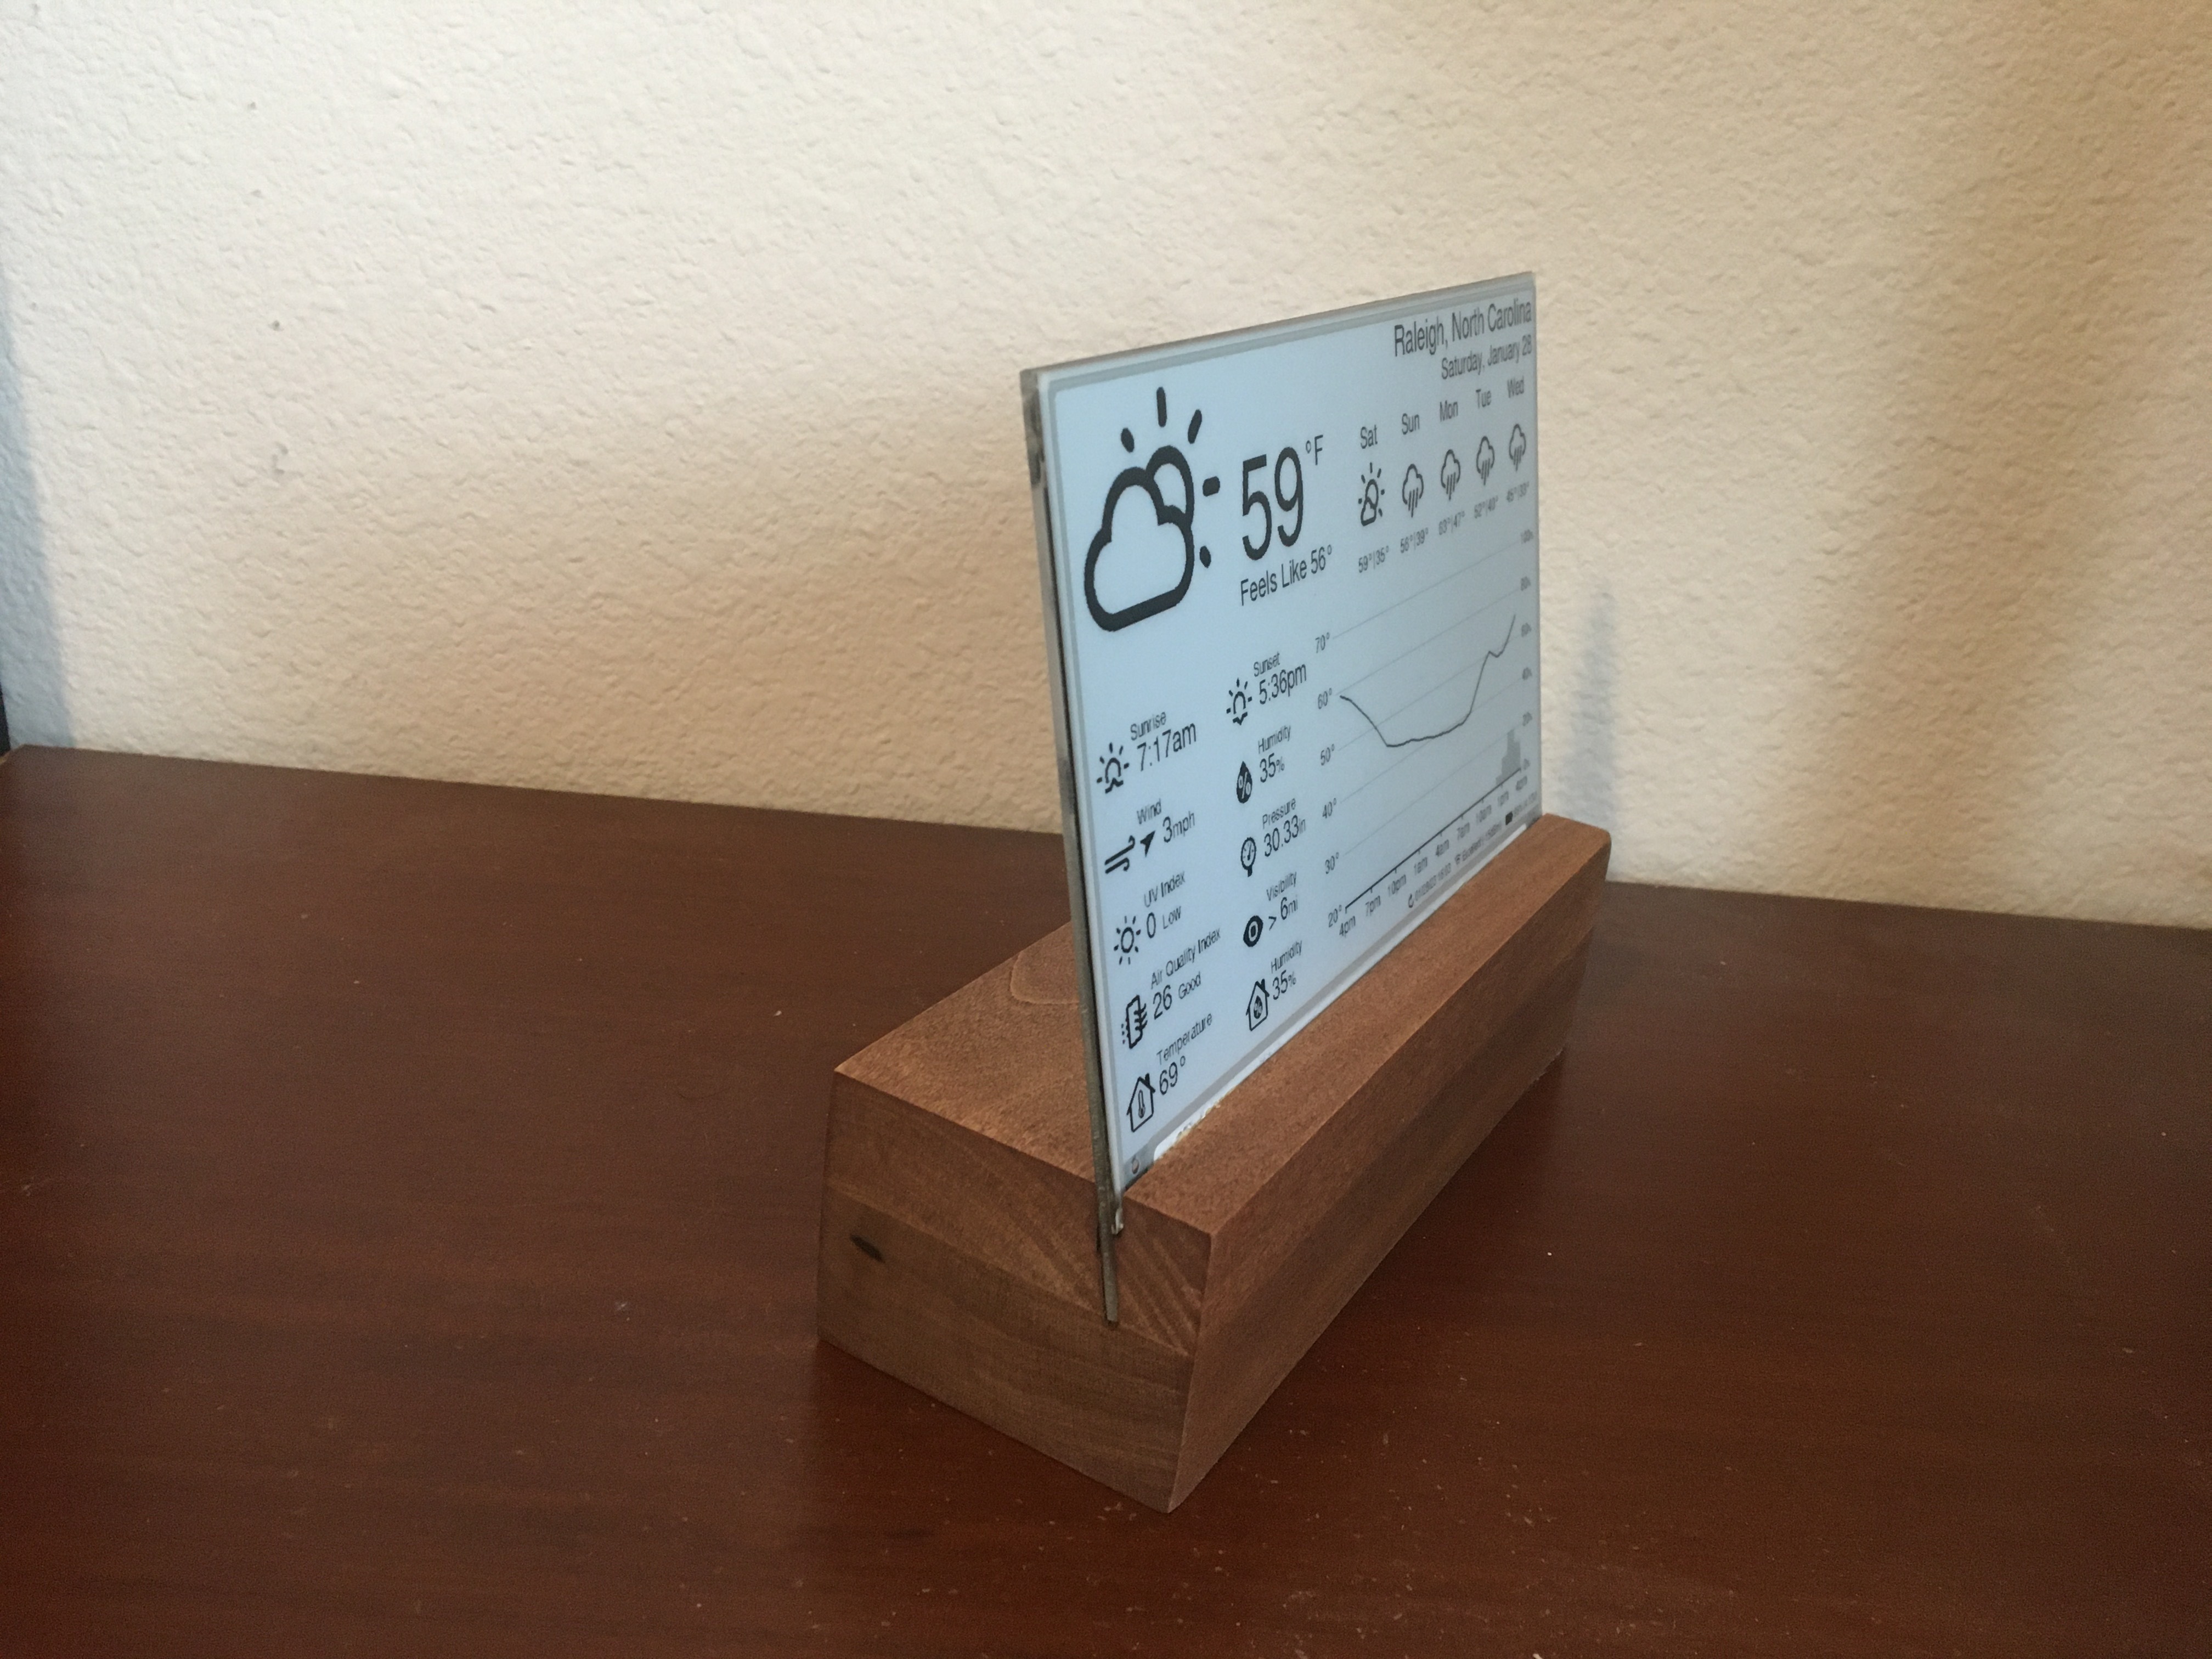 \2
\2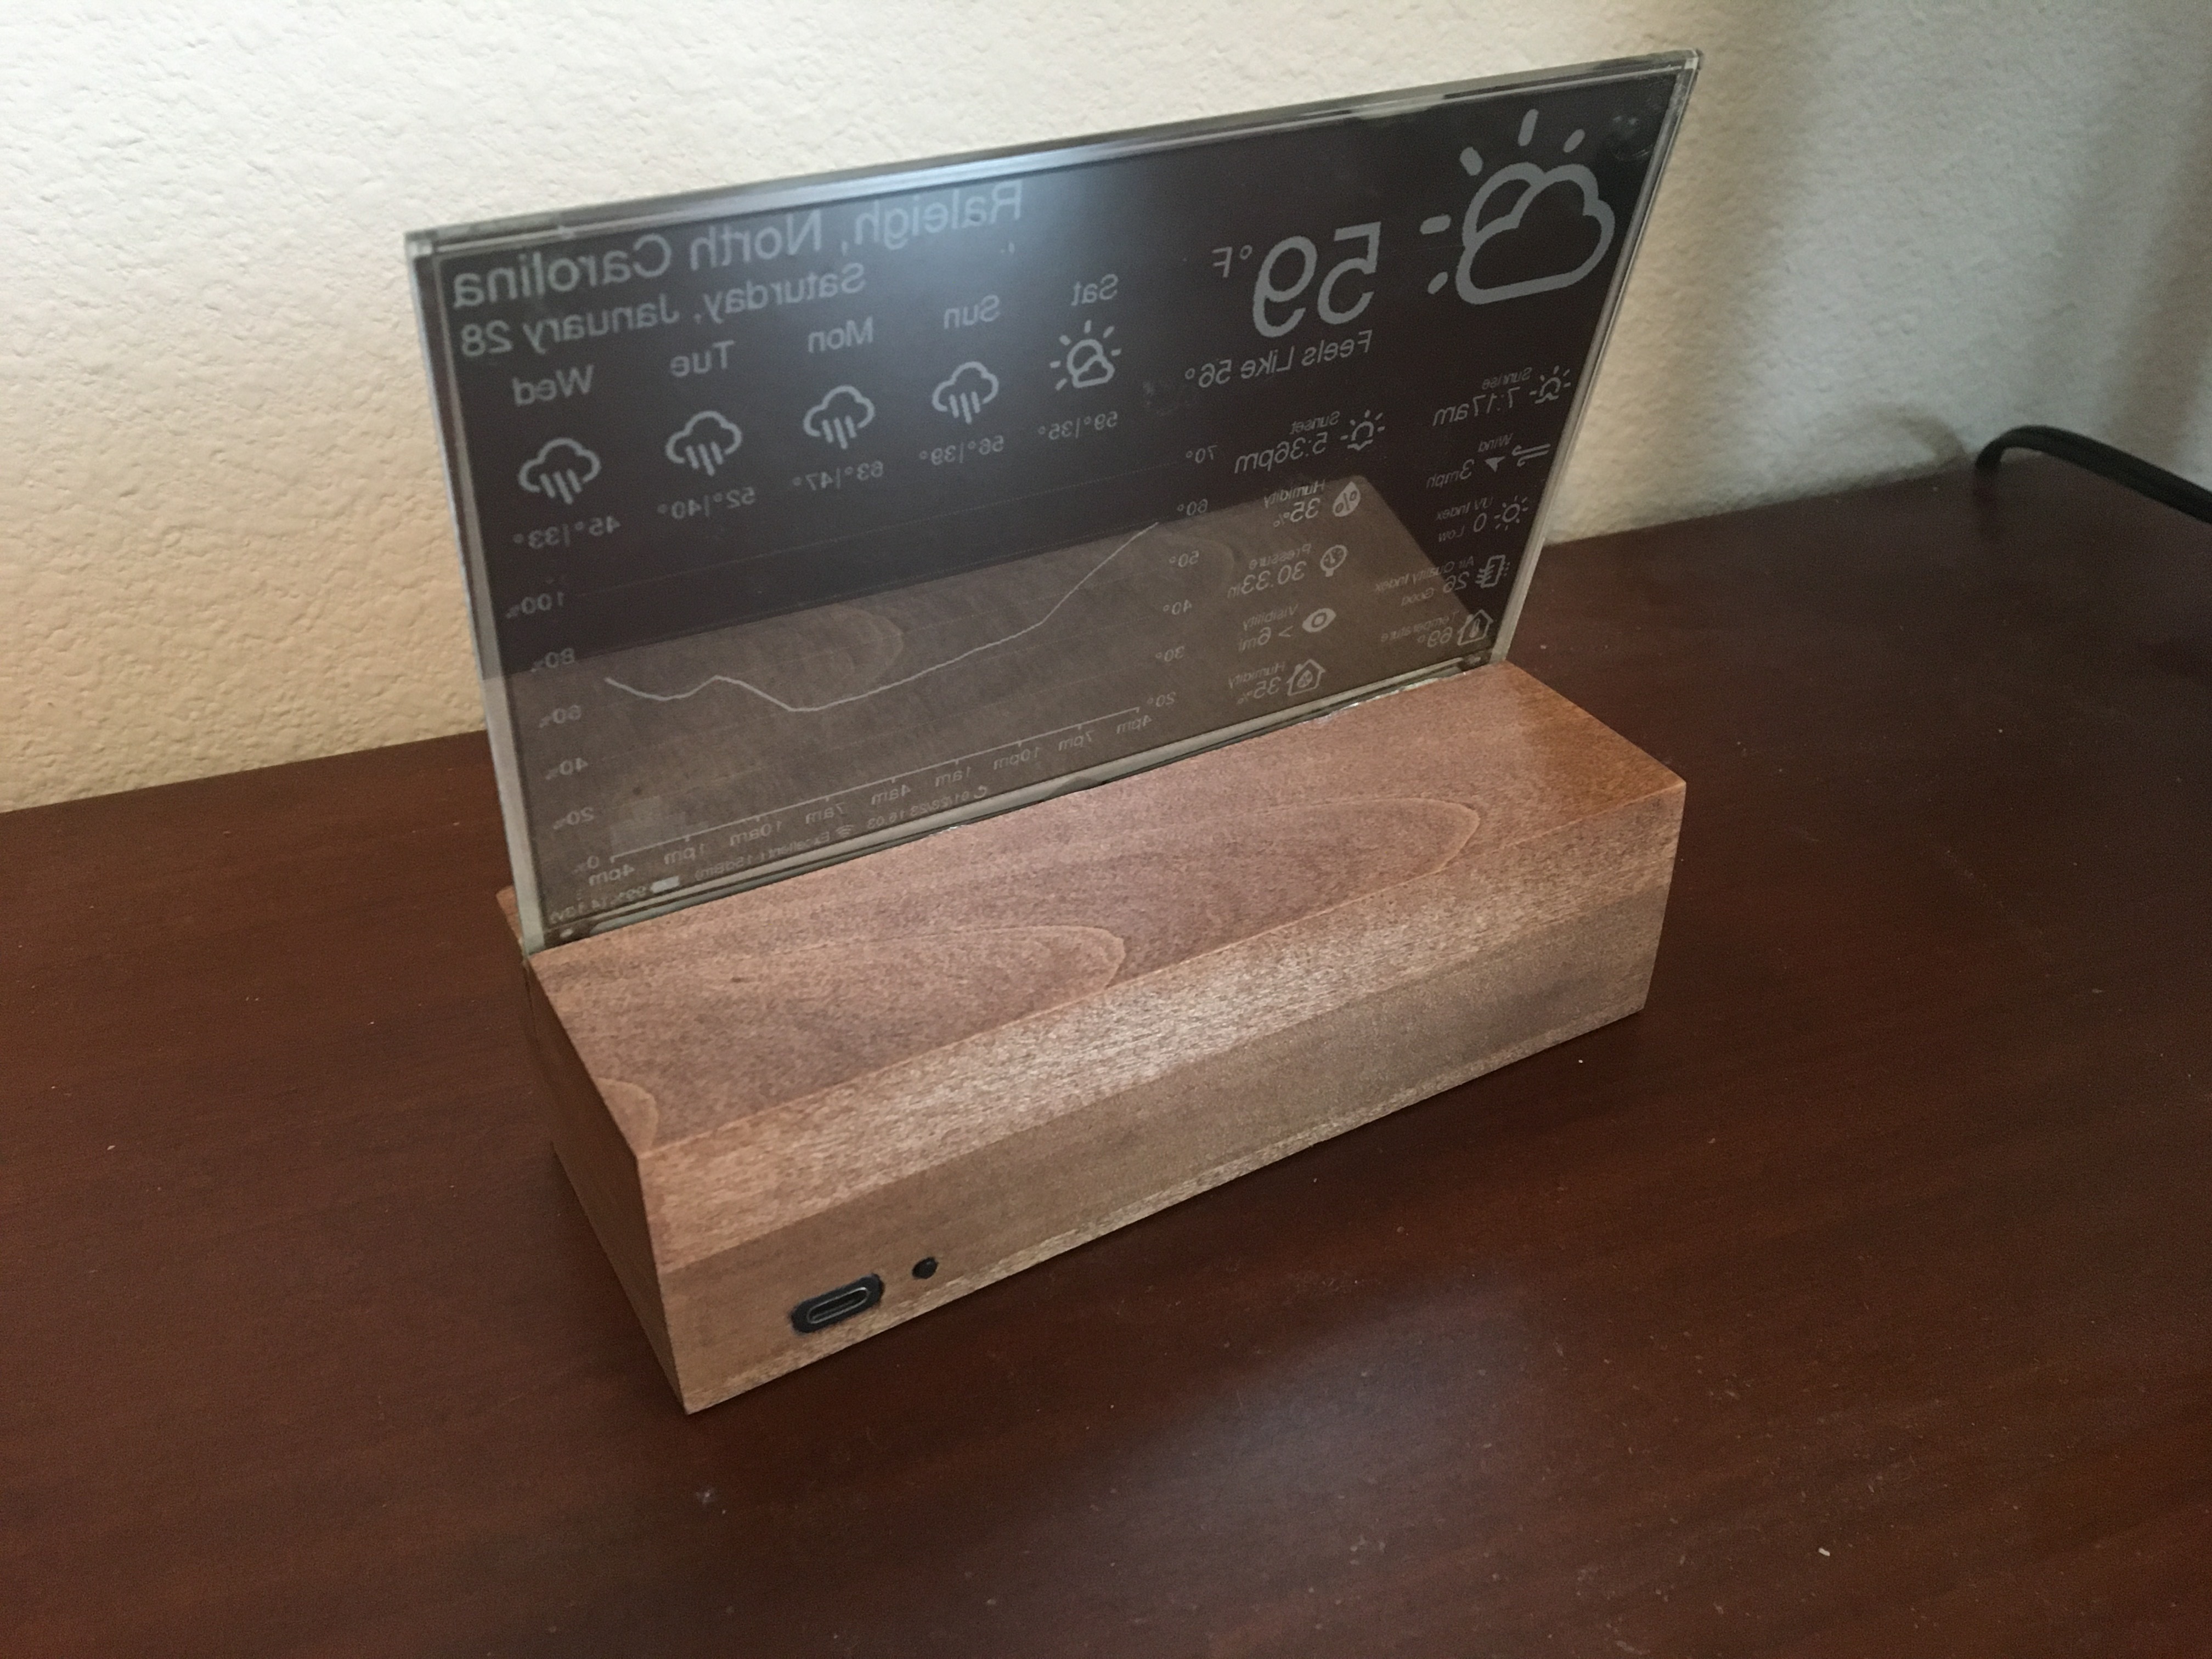 \2
\2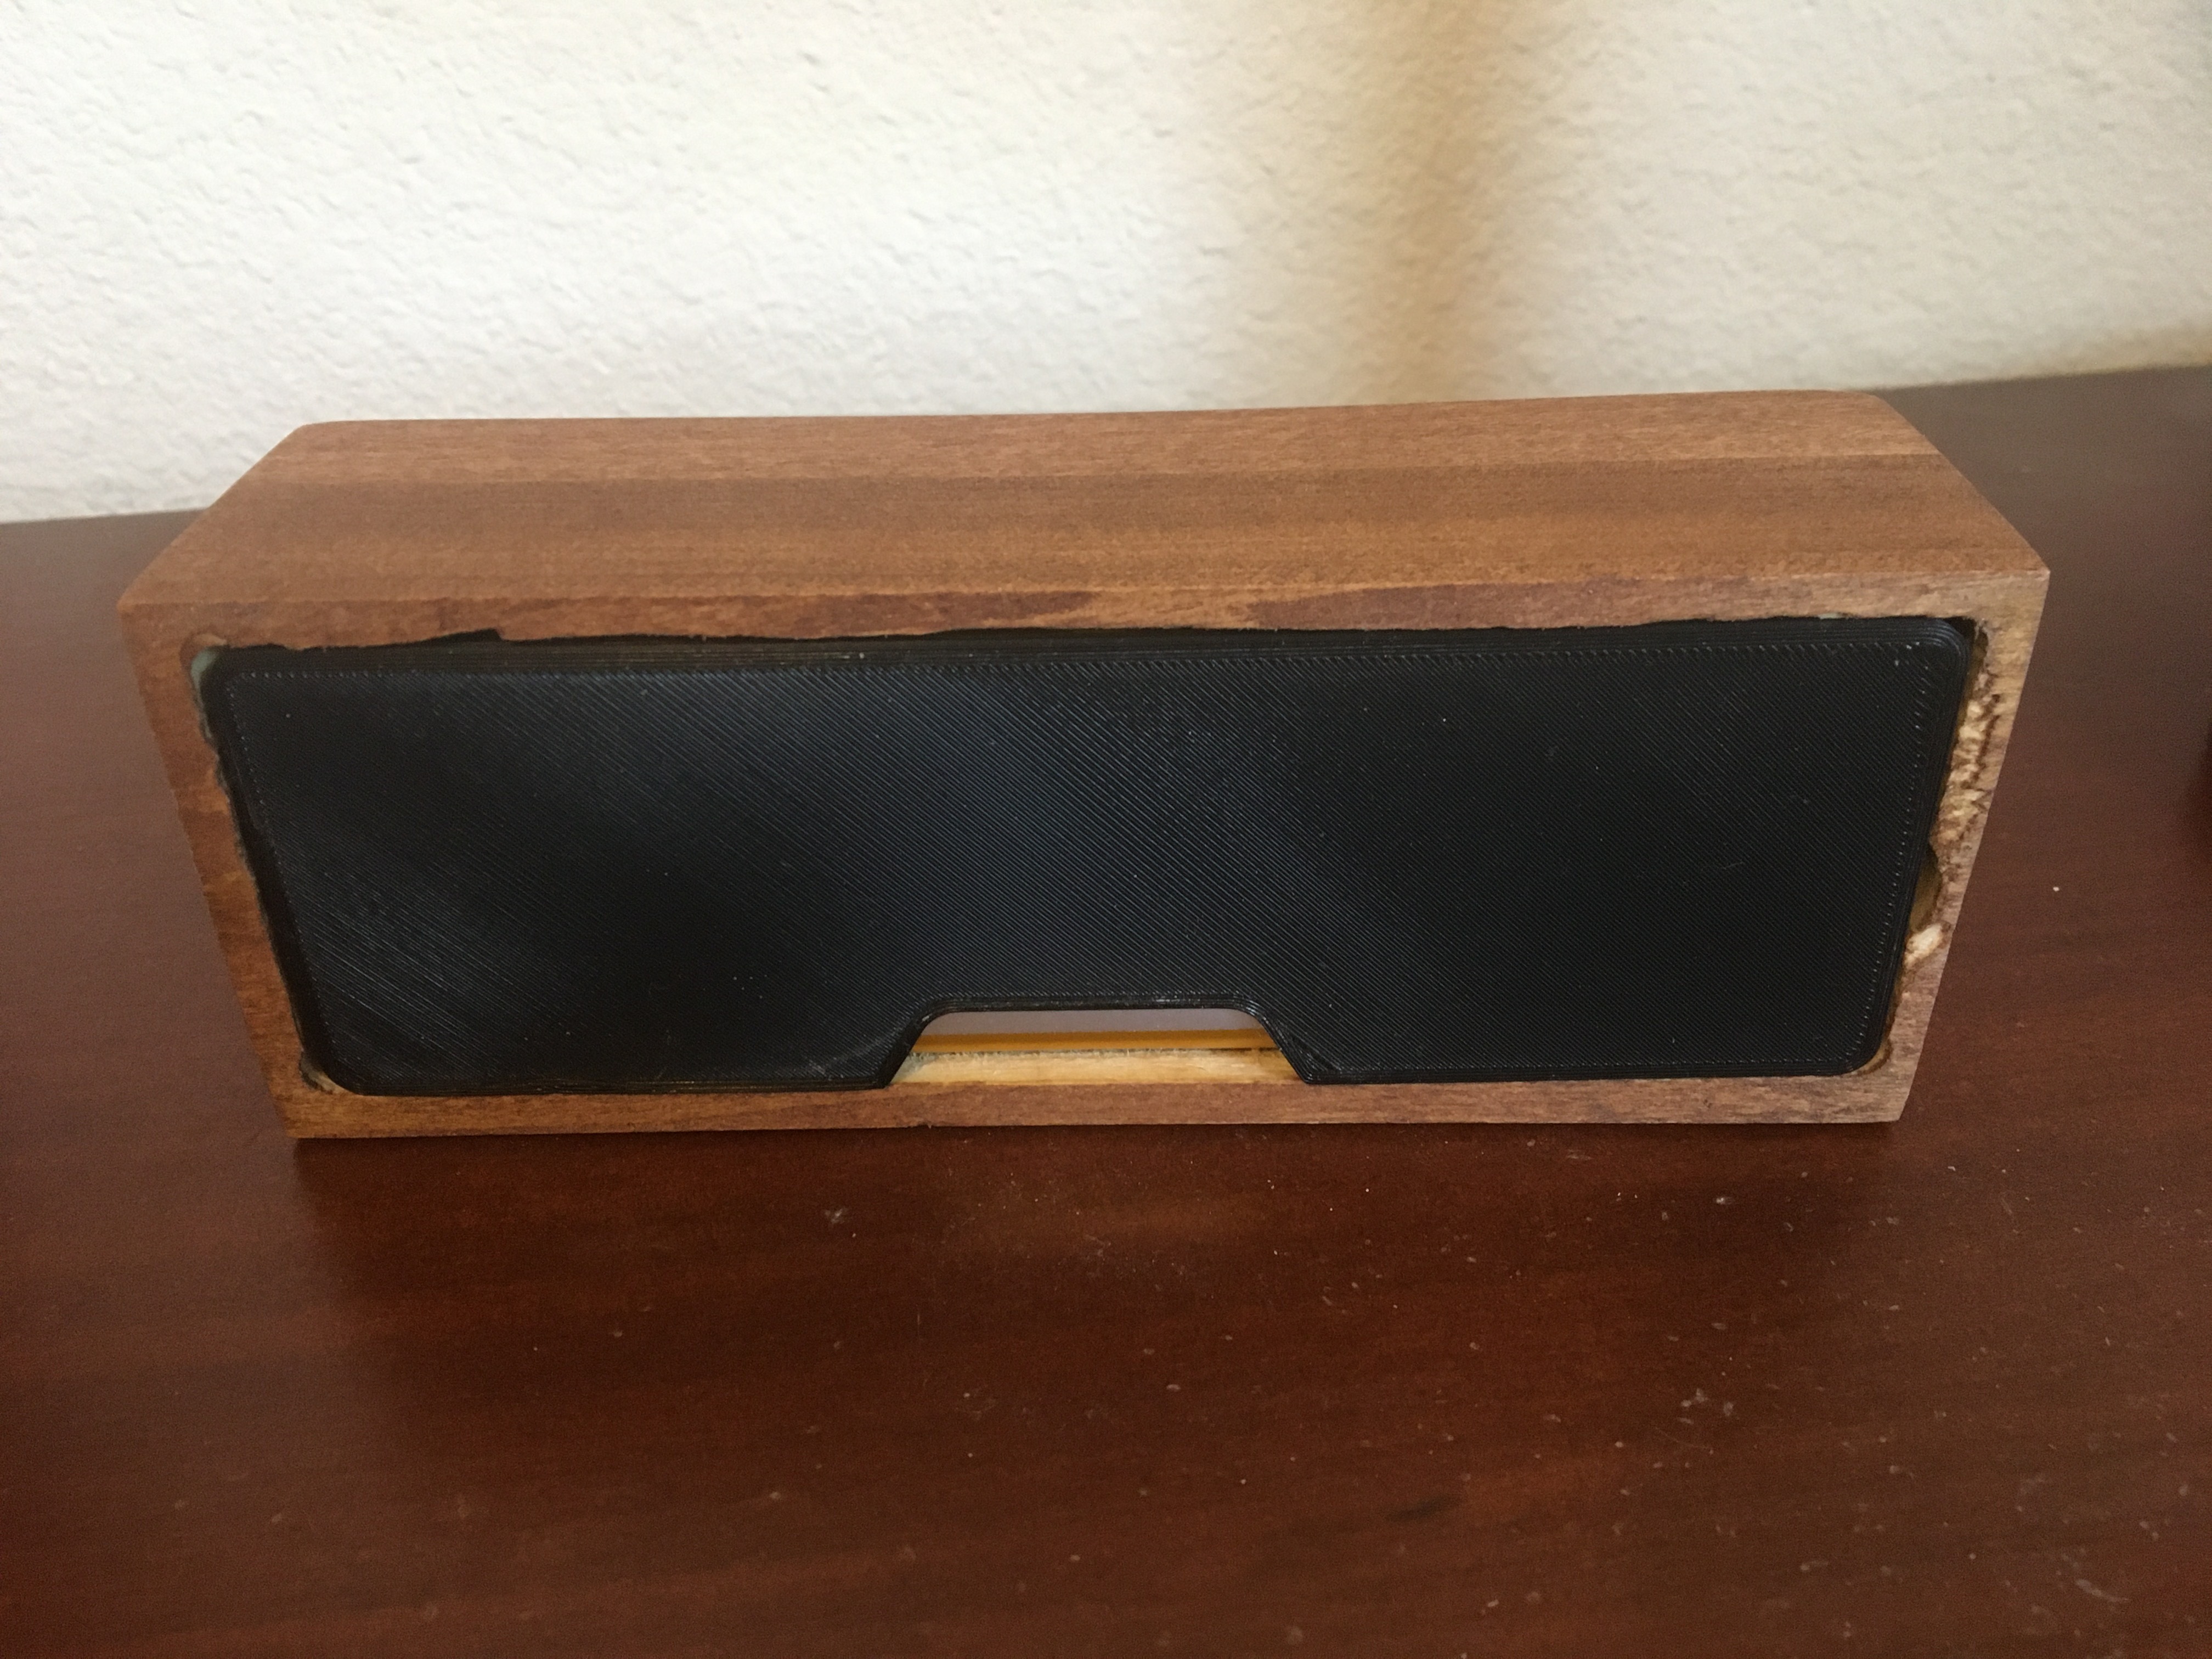 \2
\2What You Need
Hardware
| Component | Notes |
|---|---|
| FireBeetle 2 ESP32-E | Low-power design with USB-C and built-in battery management |
| 7.5" E-Paper panel | Waveshare v2 (800×480, B&W) is recommended; see Panel Support table for all options |
| DESPI-C02 adapter board | Waveshare HATs rev 2.2/2.3 are not recommended |
| BME280 sensor | 3.3 V/5 V compatible; provides indoor temperature, humidity, and pressure |
| 3.7 V LiPo with JST-PH2.0 connector | 5000 mAh gives 6+ months at 30-minute refresh |
| Jumper wires or hookup wire | Jumper wires allow a solder-free build |
| Enclosure | DIY wood, 3D-printed frame, or picture frame — see Enclosure Options in the repo |
Soldering is optional. If you buy the FireBeetle 2 ESP32-E with headers pre-installed and a BME280 module with factory-soldered headers, the whole assembly can be done with jumper wires.
Software
- VSCode with the PlatformIO extension
- A free OpenWeatherMap account and API key
- This repository (clone or download the ZIP)
Typical use cases
Mount the display in a hallway or kitchen and get current conditions, an hourly temperature graph, and precipitation probability without picking up a phone.
With six to twelve months of runtime on a 5000 mAh cell, you can place this display anywhere in your home — no nearby outlet required.
The BME280 sensor adds real-time indoor temperature, humidity, and pressure alongside the outdoor forecast on the same screen.
Switch languages, unit systems, time formats, and AQI scales in config files to tailor the display to your region and preferences before flashing.
How It Works
On each wake cycle the ESP32 connects to your Wi-Fi network, calls the OpenWeatherMap API to retrieve current conditions and hourly forecast data, reads temperature and humidity from the BME280 over I2C, renders the full display layout into a frame buffer, pushes it to the E-Paper panel via SPI through the DESPI-C02 adapter, then returns to deep sleep. The active window — connecting, fetching, drawing, and transmitting to the panel — takes roughly 15 seconds and draws about 83 mA. The rest of the time the chip draws only ~14 μA.
The hourly outlook graph in the bottom-right corner plots a temperature line and shaded bars for precipitation probability (or volume, depending on your configuration). Everything from date/time format to AQI scale is set in two source files before you flash: config.cpp for most runtime options and config.h for unit system selection.
Wiring and Hardware Setup
Follow the wiring diagram in the repository (showcase/wiring_diagram_despi-c02.png) to connect the E-Paper panel, DESPI-C02 adapter, and BME280 to the FireBeetle 2 ESP32-E.
Critical switch settings — the display will not work without these:
- DESPI-C02: Set the physical switch to position 0.47 (RESE).
- Waveshare E-Paper Driver HAT (if used instead): Set Display Config to B and Interface Config to 0.
- If you are using Waveshare rev 2.3, connect the additional
PWRpin to 3.3 V.
Battery polarity warning: JST-PH2.0 connector polarity is not standardized. Check your battery wires before plugging in and swap them in the connector if necessary.
Optional low-power pad cut: The FireBeetle 2 ESP32-E has a low-power pad that is connected by default. Cutting the thin wire in the middle of that pad with a craft knife reduces static current by 500 μA, bringing deep-sleep consumption down to ~13 μA. Note that cutting it disables the onboard RGB LED when on battery power. See the DFRobot wiki for the pad location.
The battery charges through the FireBeetle's USB-C port while the LiPo is plugged into the JST connector — no need to disconnect anything to recharge.
Configure, Build, and Flash
-
Clone the repository or download and extract the ZIP from GitHub.
-
Install VSCode and then install the PlatformIO extension (follow the instructions at
https://platformio.org/install/ide?install=vscode). -
Open the project: in VSCode go to File → Open Folder and select the
platformiosubfolder inside the repository. -
Edit
platformio/src/config.cppand set at minimum:- Wi-Fi SSID and password
- Your OpenWeatherMap API key
- Latitude and longitude for your location
- Preferred time/date formats and sleep duration
-
Edit
platformio/include/config.hto choose metric or imperial units. -
Connect the ESP32 to your computer via USB-C.
-
Upload: click the upload arrow at the bottom of the VSCode window (labeled PlatformIO: Upload on hover). PlatformIO automatically downloads all required third-party libraries, compiles, and flashes the firmware.
If you see
Wrong boot mode detected (0x13)!on a FireBeetle 2 ESP32-E: unplug power, bridge GPIO0 (labeled0/D5) to GND, then power it back up to enter download mode.
Getting your OpenWeatherMap API key: Create a free account at openweathermap.org. The README notes there are important details about the API key in the Setup Guide section of the repository — read those notes before flashing, as the wrong API plan or a key that has not yet activated will produce API errors on the display.
Extend It and Know the Limits
Ideas to extend the project
- Enclosure: The community has shared over a dozen 3D-printable enclosure designs on Printables and Thingiverse (links in the repo). The author's own build uses a hollowed-out piece of wood with a 3D-printed magnetic bottom cover and a short USB-C extension cable for easy charging without disassembly.
- Color panels: Swap in a Waveshare 7.5in E-Paper (B) for red-accent alerts or a 7.3in ACeP seven-color panel for a more vivid display. Be aware that color panels have longer refresh times, which shortens battery life.
- Reset button: Wire a push button to the ESP32's reset line and mount it on your enclosure so you can trigger an immediate refresh without removing the device from the wall.
- Update frequency: Shorter sleep intervals give more timely data but reduce battery life proportionally.
Limitations to keep in mind
- The Waveshare 7.5in v1 and its Good Display equivalent (640×384 px) have limited support — some information is not displayed.
- Color E-Paper panels increase per-refresh power draw and time, reducing the multi-month battery life advantage.
- The display depends on the OpenWeatherMap API; a service outage or expired API key will cause an API error message on screen rather than a weather update.
- Deep-sleep current (~14 μA) assumes the low-power pad has been cut; with it intact, sleep current is higher.
esp32-weather-epd is one of the most polished ESP32 display projects available, combining genuine deep-sleep engineering with a rich, configurable UI and strong community support including multiple 3D-printable enclosures. The PlatformIO workflow keeps the build approachable for intermediate makers, though you will need to read the wiring notes and switch settings carefully before powering on. If you want a practical, long-running display you can actually hang on the wall, this project delivers.
Sources
github.comlmarzen/esp32-weather-epd — repository & READMEFacts in this article come from the project's public README and GitHub metadata at the time of writing. Images belong to their respective owners and link back to the original source.