DIY Video Doorbell with Voice Response (ESP32 Cam + ESPHome)
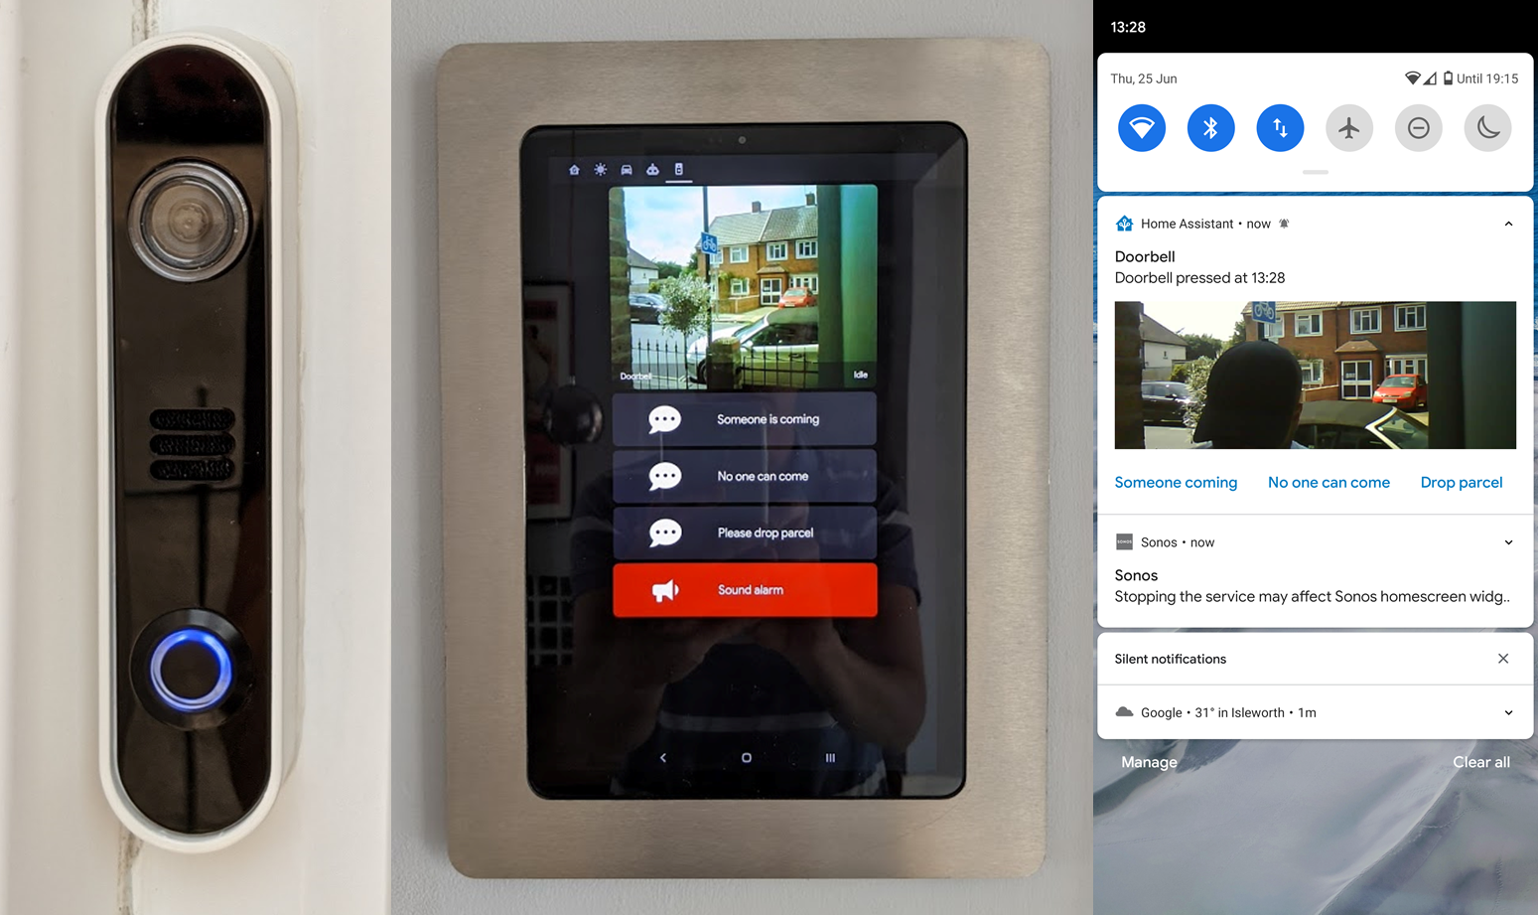
Finished doorbell unit mounted on the doorframe alongside a phone showing an actionable snapshot notification.
- ESP32-CAM (with external WiFi antenna)
- OV2640 camera module with long flex cable
- DFPlayer Mini
- Micro SD card
- Speaker
- Momentary button with LED
- ESP8266 Wemos D1 Mini (indoor chime unit)
- Amplified PC speakers (indoor chime unit)
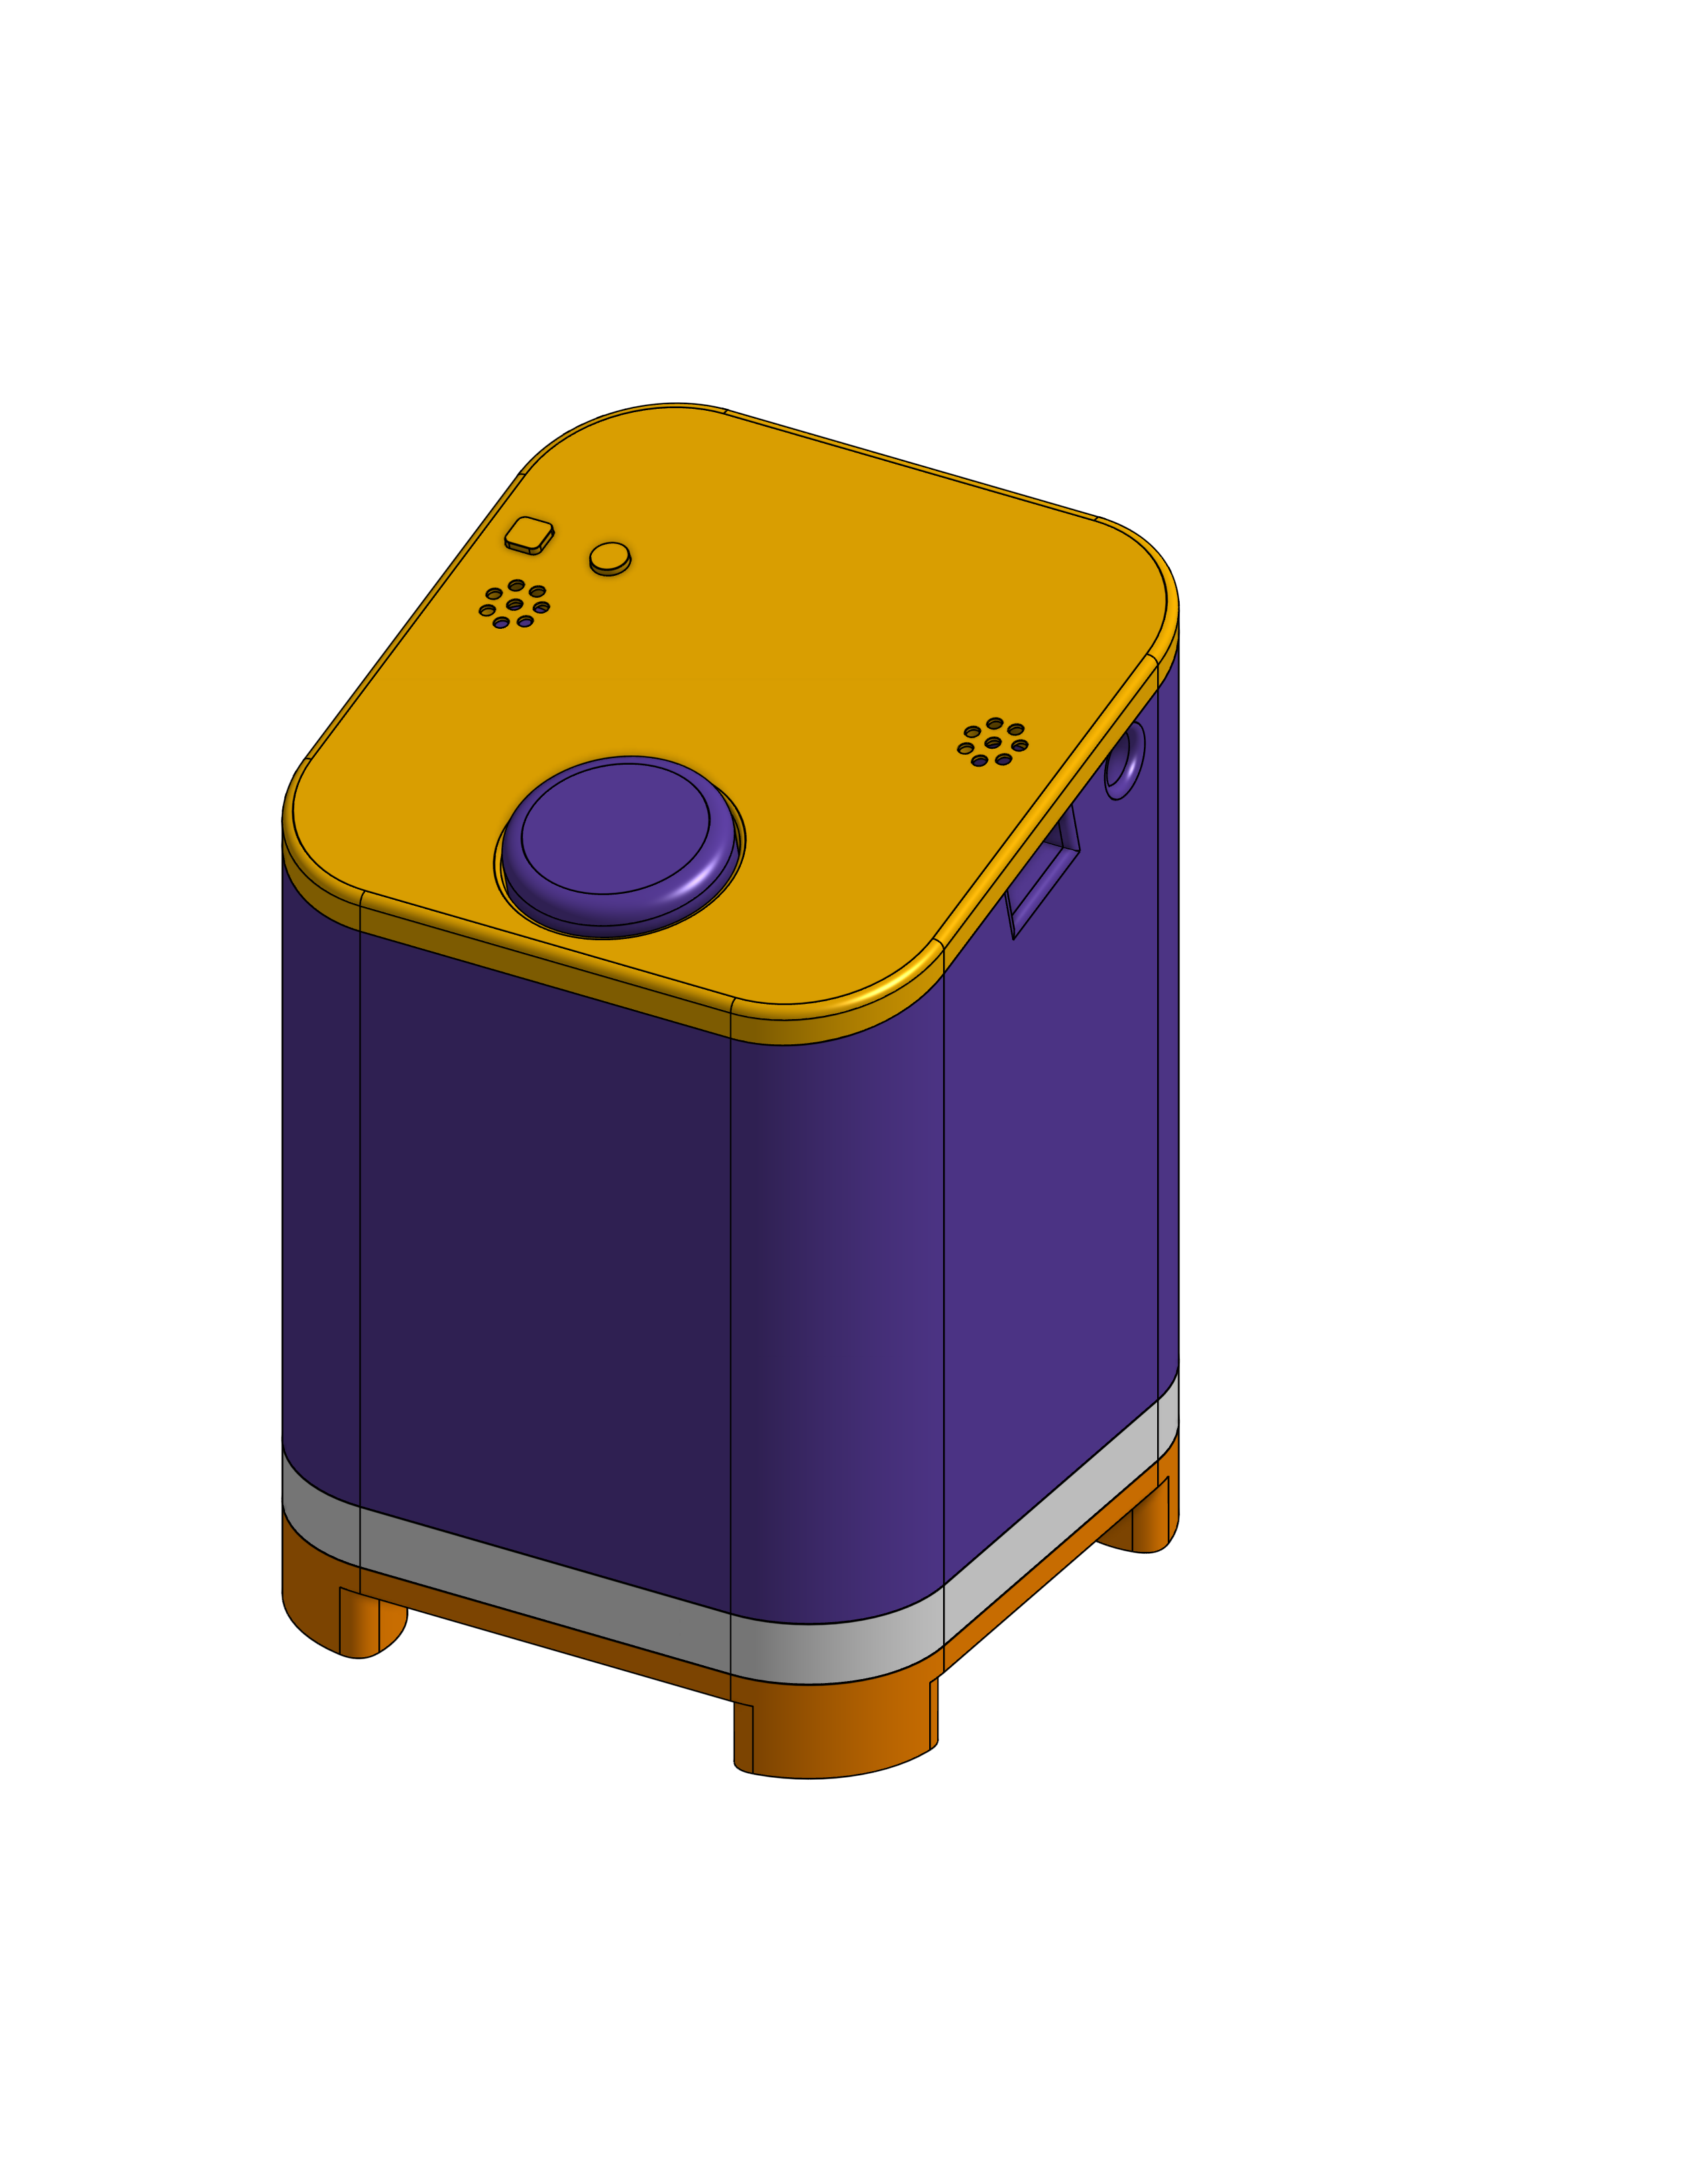
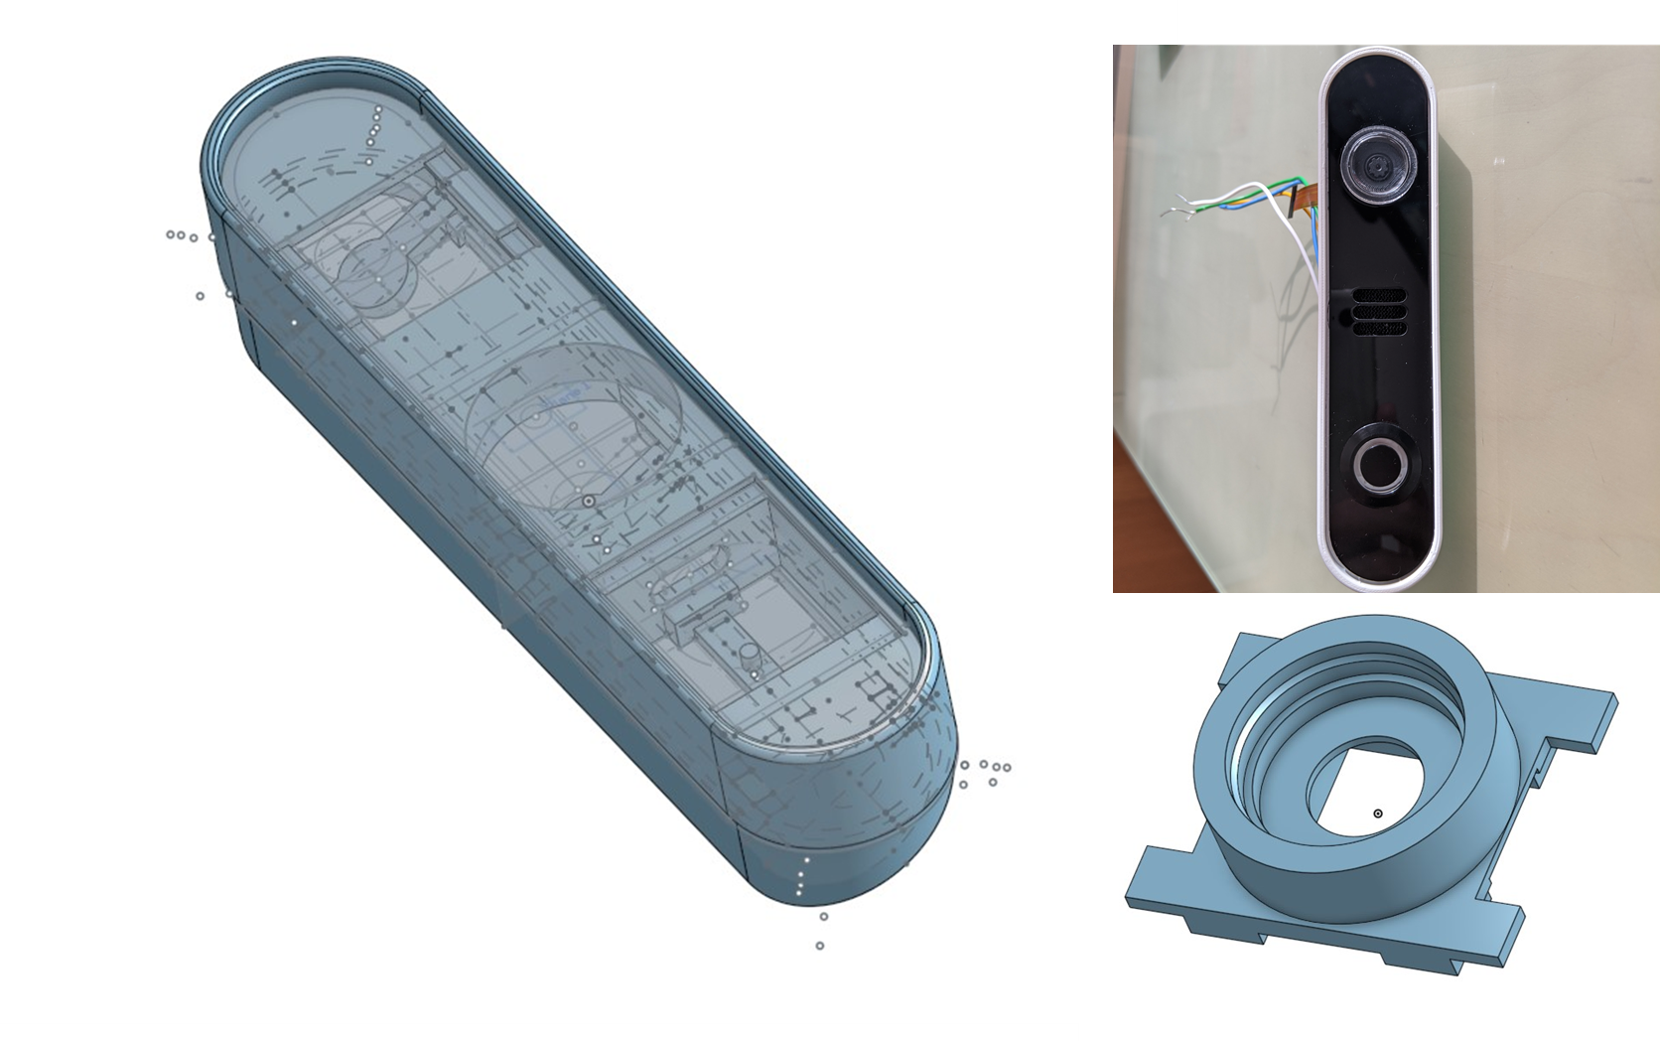
- Custom 3D printed housing (OnShape)
- Lens insert 2 mm x 16 mm
- Custom 3 mm acrylic front bezel
What You Will Build
You will build a fully local, cloud-free video doorbell that does several things the commercial alternatives do not:
- Plays an audible "ding dong" and blinks an LED the moment someone presses the button.
- Sends an actionable notification with a camera snapshot to your phone. You tap a reply and one of three pre-recorded voice messages plays through the doorbell speaker — for example "Someone is coming to the door" or instructions to leave a parcel.
- Pops up a live camera view on wall-mounted tablets, with the same voice-reply buttons and an alarm option.
- Triggers separate indoor chime units anywhere in the house.
All processing happens inside your home. No cloud subscription, no third-party servers, no monthly fee. The demo video linked in the README shows the full flow in real time.
 \2
\2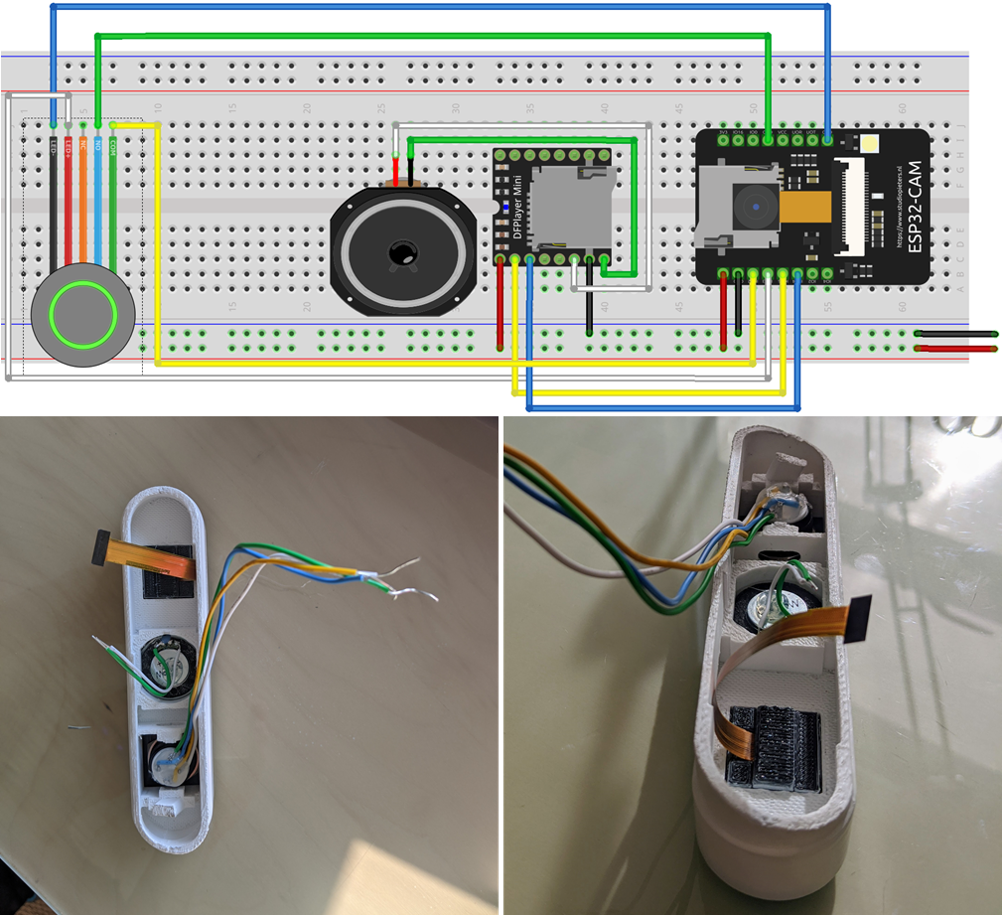 \2
\2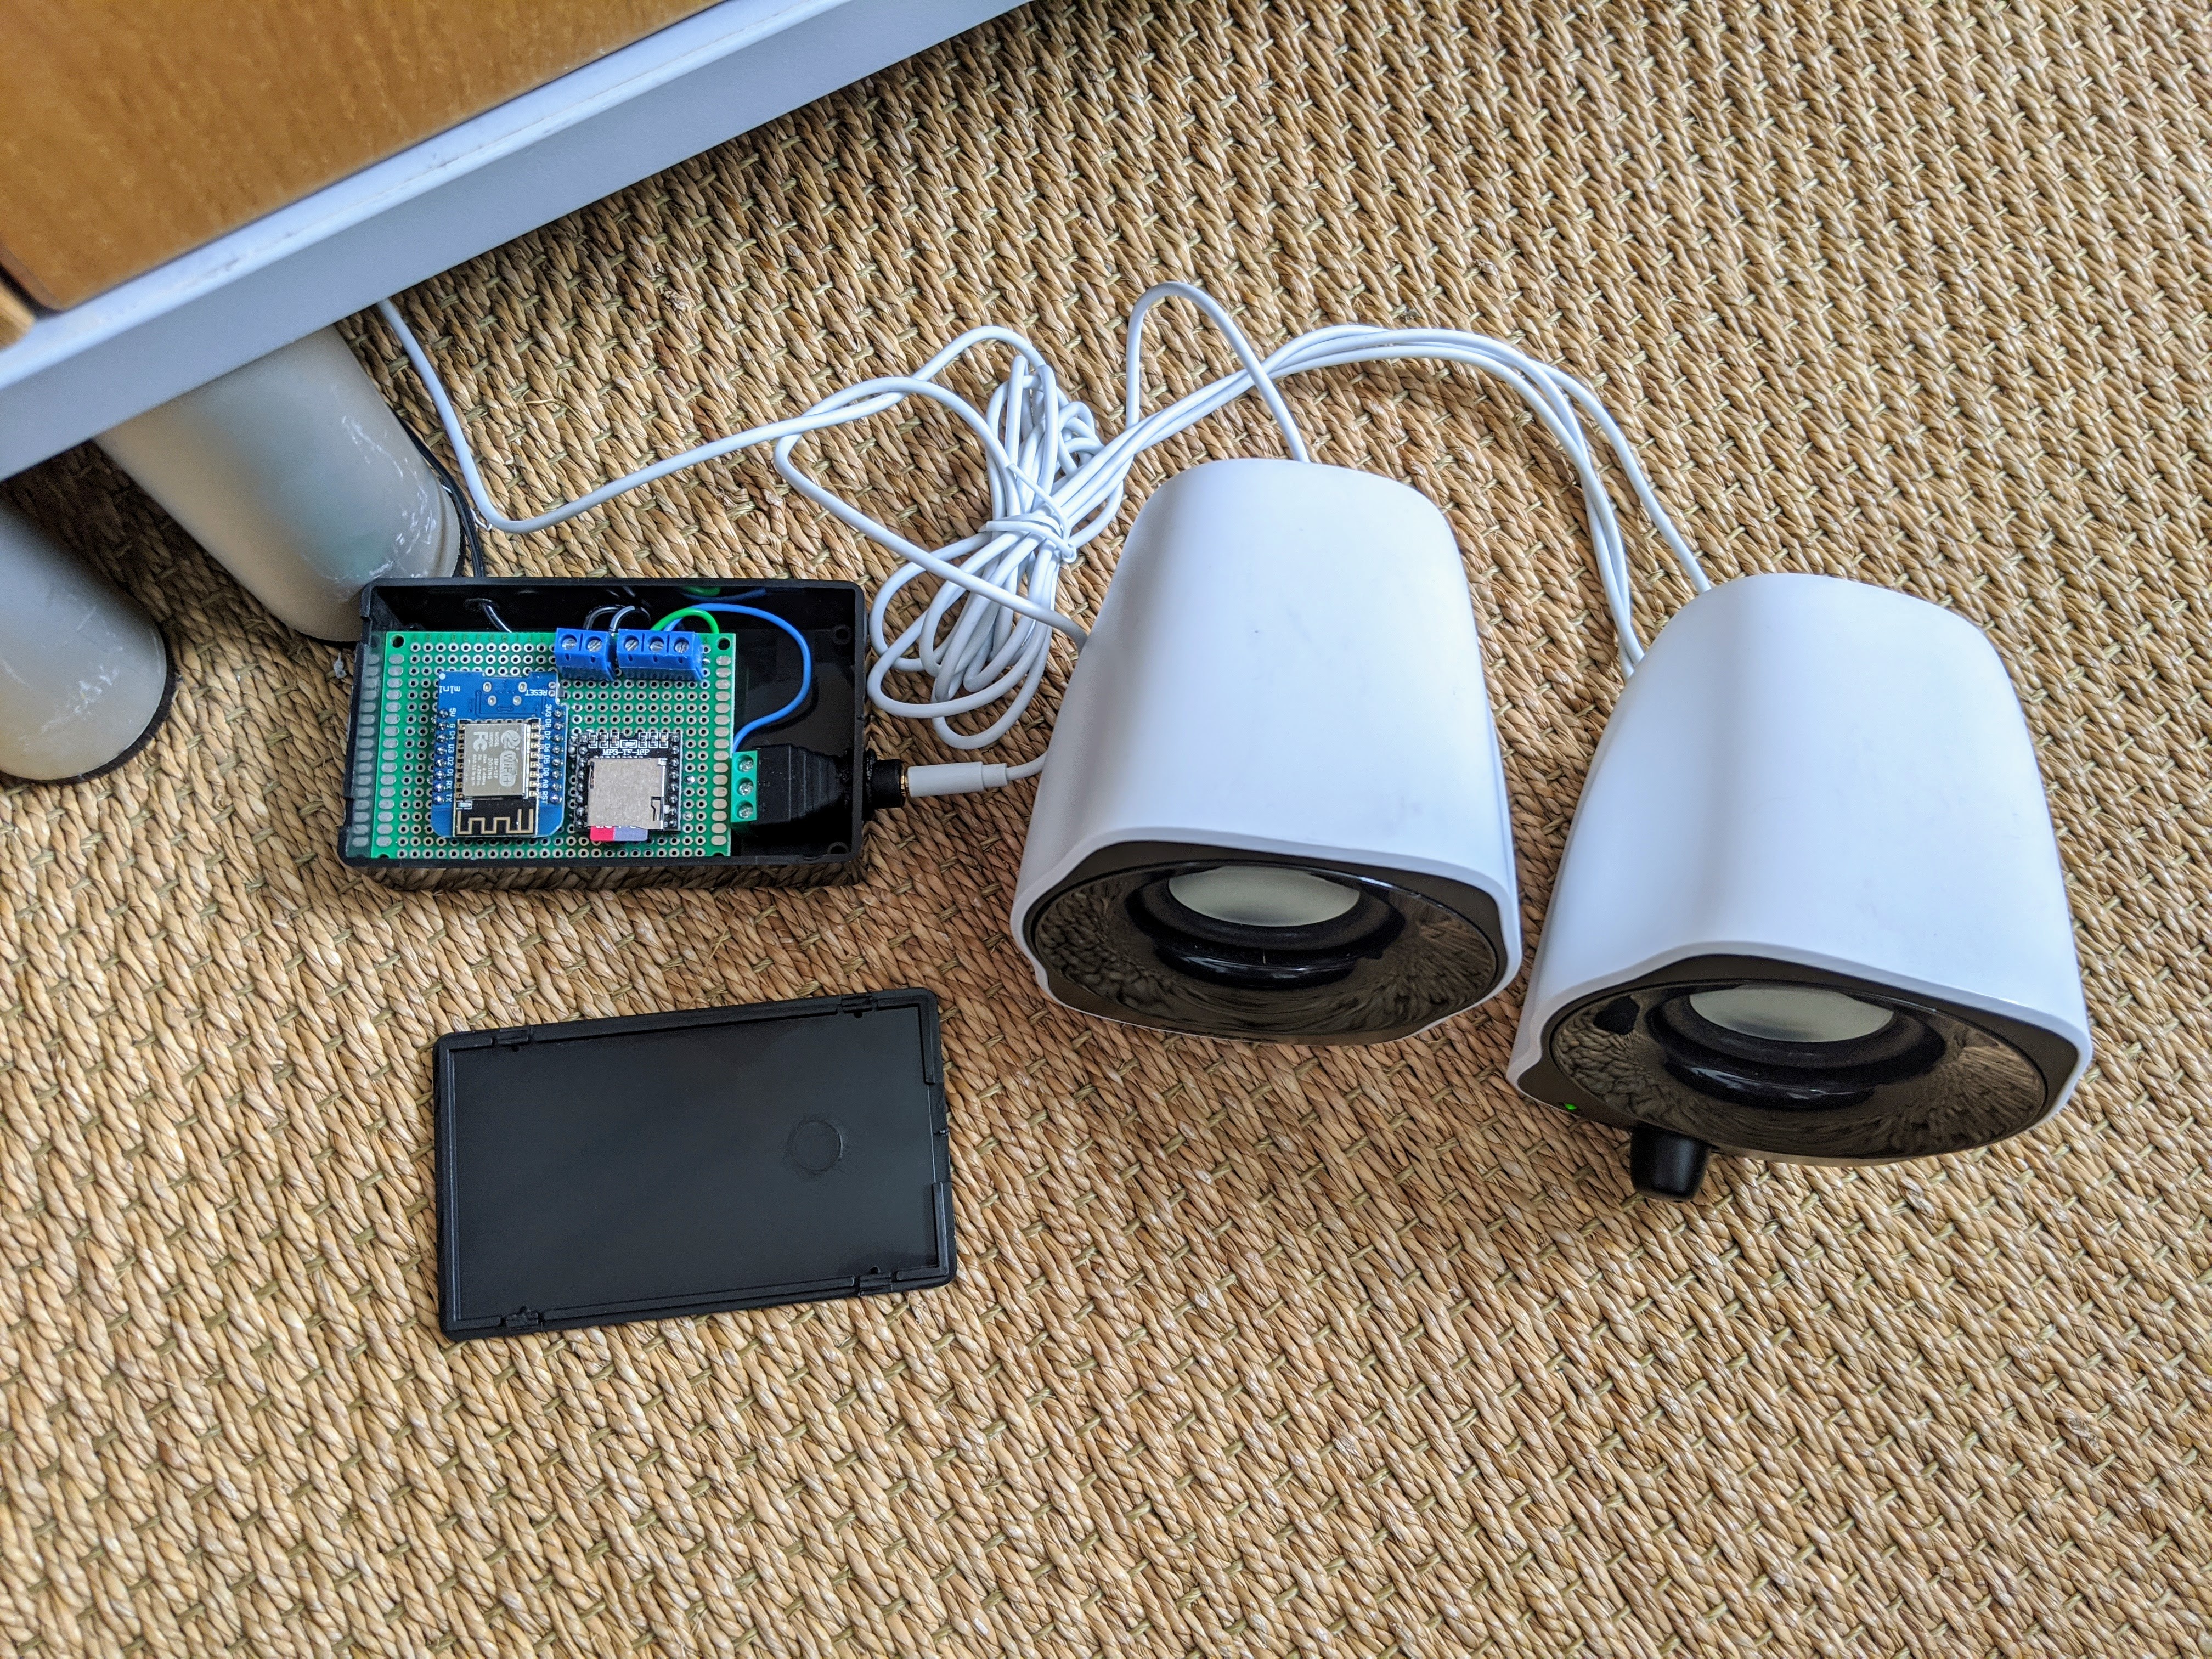 \2
\2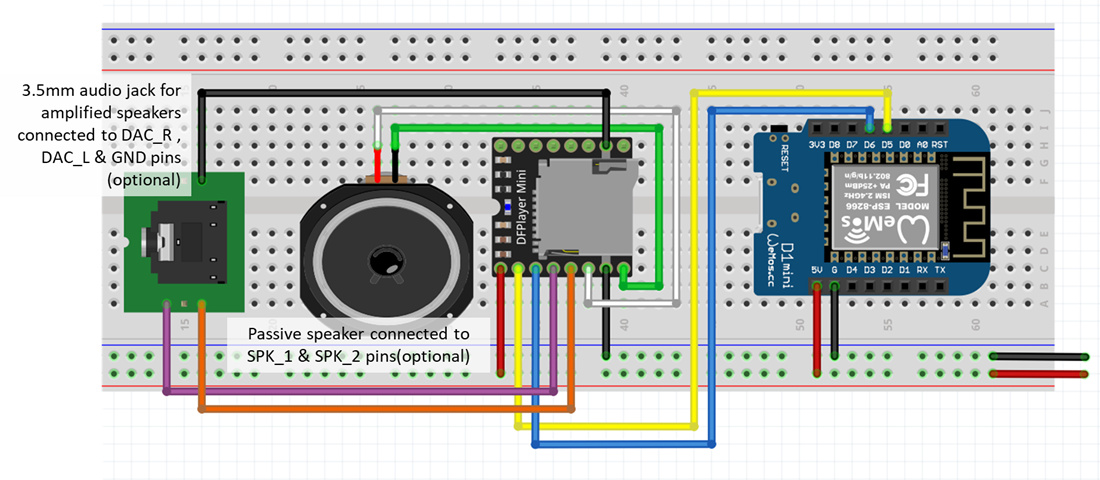 \2
\2What You Need
Hardware — doorbell unit
- ESP32-CAM board (the README uses one with an external WiFi antenna)
- OV2640 camera module with a long flex cable (important — explained in the next section)
- DFPlayer Mini MP3 player module + micro SD card
- Small speaker
- Momentary push-button with integrated LED
- Custom 3D printed housing (OnShape file linked in the README)
- Lens insert 2 mm × 16 mm
- Custom 3 mm acrylic front bezel (EPS file in the repository, laser-cut by Razorlab)
- Speaker fabric (hot-glued over the speaker holes)
- 5 V USB power run through the doorframe
Hardware — indoor chime unit (optional but recommended)
- ESP8266 Wemos D1 Mini
- Second DFPlayer Mini + micro SD card
- Amplified PC speakers (3.5 mm jack) or a bare speaker wired directly
Software
- Home Assistant — the local smart home hub that ties everything together
- ESPHome — flashes and manages both ESP boards via YAML configuration
- browser_mod — drives the pop-up live view on wall tablets
- button-card — custom Lovelace UI cards for the voice-reply buttons
- Home Assistant Companion App on your phones
- Notifications for Android TV (if you use Android tablets as wall panels)
Typical use cases
Receive a camera snapshot on your phone and reply with a pre-recorded voice message played through the doorbell — without touching your door or opening an app beyond the notification.
Everything runs locally through Home Assistant and ESPHome. No subscription, no cloud relay, and no dependency on an external service going offline.
Extend the build with any number of ESP8266-based indoor chime units to cover an entire house, all triggered by the same Home Assistant automation.
Pop up a live camera feed with voice-reply buttons on wall-mounted tablets the moment someone rings, giving household members a hands-free way to respond.
How It Works
When the button is pressed the ESP32-CAM fires a signal to Home Assistant via ESPHome. Home Assistant then runs a set of automations and scripts that:
- Blink the button LED and trigger the DFPlayer Mini inside the doorbell to play the chime sound.
- Tell the indoor chime ESP8266 to play the same sound through the house speakers.
- Take a camera snapshot and push an actionable notification to the phones.
- Pop up a live camera card on wall-mounted tablets.
When you choose a voice reply (either from the phone notification or the tablet pop-up), Home Assistant calls a script that tells the DFPlayer Mini in the doorbell to play the matching MP3 file from the SD card.
Why the long-flex camera module? When the ESP32-CAM is mounted in portrait orientation the image is rotated 90 degrees. Fitting a long flex cable lets you mount the main board horizontally while aiming the sensor correctly, avoiding a software rotation that would also affect snapshot notifications. The README notes that card-mod can rotate the Lovelace view as an alternative, but the snapshots would still arrive rotated.
All configuration files — ESPHome YAML for the doorbell and the chime unit, Home Assistant automations, scripts, and Lovelace cards — are provided in the repository.
Mechanical and Electrical Assembly
The housing is tight by design because it had to fit on a narrow doorframe at an angle. The README is upfront about this: if you have more space, consider redesigning the housing in OnShape to be wider.
Mechanical steps
- Print the housing from the OnShape file linked in the README. Expect several iterations — the author notes the files reflect real trial-and-error.
- Have the acrylic front bezel laser-cut from the EPS file in the repository.
- Fit the lens insert (2 mm × 16 mm) into the camera aperture.
- Hot-glue speaker fabric over the speaker grille holes.
Electrical steps
- Connect the DFPlayer Mini to the ESP32-CAM UART pins as shown in the ESPHome DFPlayer component documentation.
- Wire the momentary LED button to a GPIO on the ESP32-CAM — the ESPHome YAML in the repository defines which pins are used.
- Mount the camera module using the long flex, routing the flex through a gentle 90-degree bend so the sensor faces the correct direction while the board mounts flat.
- Run a 5 V USB cable through the doorframe for power.
For the indoor chime unit, the repository includes a wiring diagram showing both the 3.5 mm amplified-speaker option and a direct speaker connection.
Preparing the SD Card and Audio Files
Both DFPlayer Minis — the one in the doorbell and the one in the chime unit — read MP3 files from a micro SD card. The README recommends Orange Free Sounds for chime audio and an app such as MyVoice (Android) for generating the voice-reply MP3s.
The DFPlayer Mini cheat sheet linked in the README covers full preparation details and works on any OS that supports FAT32 formatting. In short:
- Format the SD card as FAT32.
- Rename the files following the example: 001.mp3, 002.mp3, etc. Keep track of which files are which number so that you can refer to them correctly in the ESPHome code later.
- Copy the files to the card in the order of the numbering. So, for example, copy 001.MP3 to the card first.
The file numbering must match the track numbers you reference in the ESPHome YAML. Load the card into the DFPlayer Mini before sealing the housing.
Flashing and Configuration
The repository contains ESPHome YAML files for both the doorbell ESP32-CAM and the chime ESP8266, plus Home Assistant automations, scripts, and Lovelace card configurations.
- Add the ESPHome YAML for the doorbell to your ESPHome dashboard in Home Assistant. Review the pin assignments and update any that differ from your wiring.
- Flash the ESP32-CAM using the ESPHome dashboard (OTA after the first wired upload).
- Repeat for the chime ESP8266 if you are building that unit.
- Import the Home Assistant automations, scripts, and Lovelace cards from the repository. The README notes that all pieces should be present; raise a GitHub issue if anything is missing.
- Install browser_mod and button-card via HACS (Home Assistant Community Store) if you have not already.
- Configure your phone's Home Assistant Companion App to receive actionable notifications.
The live camera view and voice-reply pop-ups on wall tablets are driven by browser_mod — follow its own documentation to register each tablet as a browser device in Home Assistant.
Extending the Project and Limitations
Ideas from the README
- The author already uses multiple chime units — one downstairs, one upstairs — each an ESP8266 Wemos D1 Mini with a DFPlayer Mini. You can add as many as your Home Assistant automations can reach.
- The tablet pop-up includes an alarm button that loops an alarm sound until stopped. You could expand the voice-reply library by adding more MP3s to the SD card and creating matching Home Assistant scripts.
- If you have more doorframe space than the author, redesign the housing in OnShape for a wider, easier-to-assemble enclosure.
- The README mentions card-mod as an alternative to the long-flex rotation trick if you only care about the Lovelace view and not the snapshot orientation.
Known limitations
- Video recording and snapshot archiving are listed as a to-do item — the current build sends snapshots on demand but does not record continuously.
- The housing design is specific to the author's narrow doorframe and is not weatherproof by design; the install location happens to be sheltered from rain.
- Assembly inside the housing is described as very tight, which makes initial wiring and iteration slow.
- There is no stated software license in the repository.
This is a polished, well-documented project that solves a real problem — a fully local video doorbell with interactive voice replies — using readily available ESP32 hardware and the Home Assistant ecosystem. The build demands patience with tight mechanical assembly, some 3D printing or laser-cutting, and familiarity with ESPHome YAML and Home Assistant automations, so it is best suited to makers who already have a running Home Assistant instance. The payoff is a professional-looking doorbell with capabilities that most commercial products lock behind a cloud subscription.
Sources
github.comronschaeffer/video_doorbell_voice_response — repository & READMEFacts in this article come from the project's public README and GitHub metadata at the time of writing. Images belong to their respective owners and link back to the original source.